Introduction:
As developers it's our responsibility to ensure efficient and quality source code. And sometimes it may be required to generate the quality report of the source code. SonarQube is a Code Quality Assurance tool that collects and analyzes source code and provides reports for the source code quality of our project. It is a static code analyzer tool on the server side, which is very useful in writing efficient and quality code. We should have SonarQube running on local host or server. It's an open-source software platform. It may efficiently be used to check the quality of the code and for easy bug fixes.
What is SonarQube?
SonarQube is an open-source framework developed by SonarSource. SonarQube is available for free under the GNU Lesser General Public License. It offers reports on duplicated code, code coverage, code complexity, coding standards, comments, unit tests, bugs and security recommendations.
SonarQube includes support for the 20 programming languages such as Java, Swift, Python, JavaScript, C, C++, C#, TypeScript and Go.
Why use SonarQube?
SonarQube is one of the most recommended application security testing solutions, completely free and trusted by many teams. It provides a comprehensive listing of errors and bugs in source code as per the coding standards. We can write our custom standards as well.
SonarQube increases productivity by allowing development teams to detect and muzzle duplication and redundancy of the code. It reduces the scale, cost of maintenance, application size, code complexity & time. It makes code easier to read and understand.
SonarLint V/S SonarQube:
Sonarlint and SonarQube both are the products of SonarSource. Both are dependent on the same analyzers for static source code-most of which are written using SonarSource technology.
Generally, we are using SonarLint plugin for our source code quality check, the plugin is inbuilt available with the Android Studio IDE. We need to install that plugin. But the limitation with this plugin is, we can't generate the quality report. It will support up to IDE level only.
Coming to SonarQube it will give our code base a 360 degree view of the quality. It is a Central server which performs full analysis on the project.
The below are the major differences between SonarLint, SonarQube
SonarLint:
- SonarLint works more like a plugin. SonarLint is an agent that allows us to connect with this SonarQube and execute the analysis remotely.
- SonarLint exists only in the IDE (IntelliJ, Visual Studio and Eclipse).
- Its aim is to provide immediate feedback as you type in your code.
- It focuses on what code you add or update for this function.
- SonarLint does not perform scans with 3rd party analyzers.
- At the developing stage only, we use this SonarLint, we can't generate the quality report using this.
SonarQube:
- SonarQube has a server associated with it.
- SonarQube is a central server which performs full analysis (triggered by the different SonarQube scanners).
- SonarQube gives a vision of the quality of your complete project code base.
- SonarQube periodically analyzes all of the source lines of your project.
- SonarQube performs scans with 3rd party analyzers (stylecorp, findBugs, checkstyle, PMD).
- We are able to generate the Quality report using SonarQube.
SonarQube integration with Android Studio:
For the SonarQube integration we should follow these 2 major steps.
- SonarQube Android Studio - (IDE) related changes.
- SonarQube Local server setup related things.
For IDE, Coding point of view things need to follow below steps:
- Install Sonar Plugin in IDE (Android Studio).
For that, File --> Settings --> Plugins ---> install the Sonar plugin.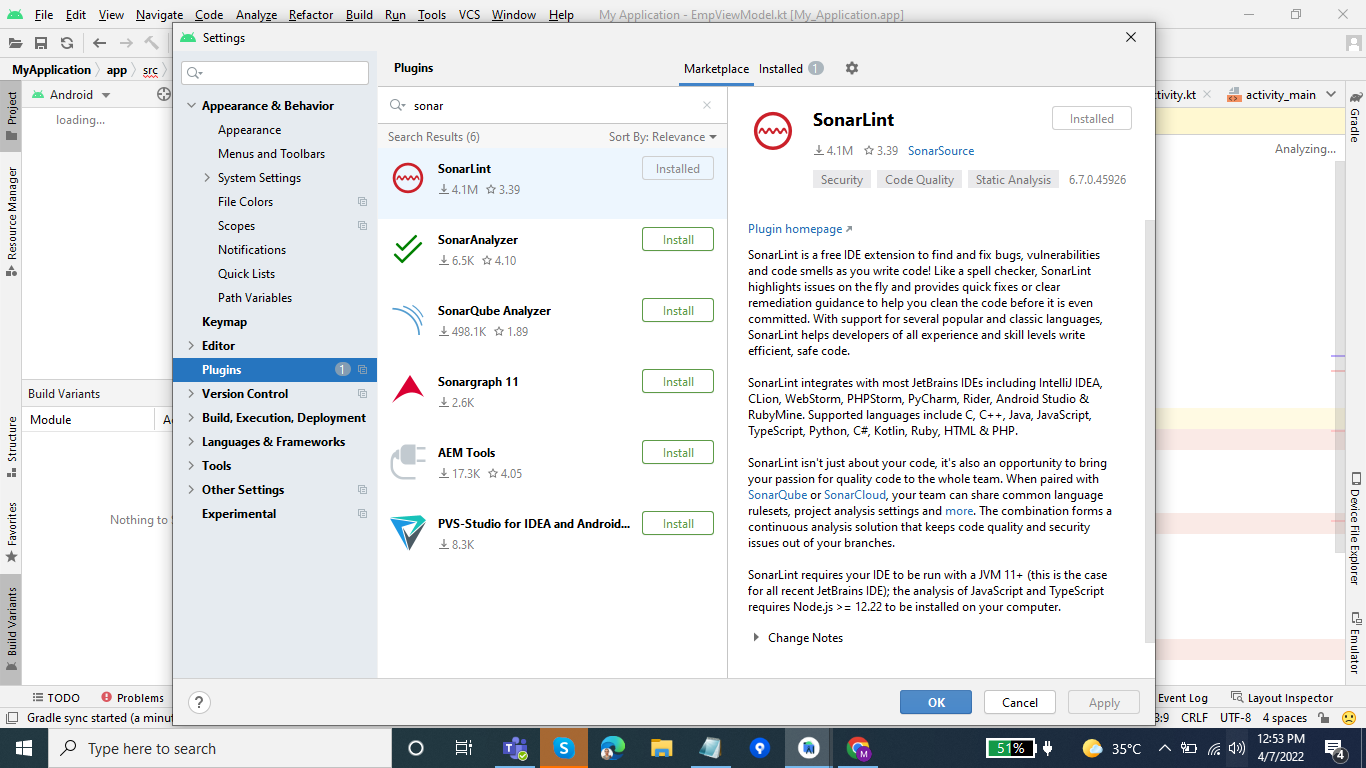
- Add the Project, Module level dependencies like below:
//Project level gradle file

repositories {
        google()
        jcenter()
        maven { url "https://plugins.gradle.org/m2/"}
    }
    classpath 'com.android.tools.build:gradle:4.1.1'
    classpath "org.sonarsource.scanner.gradle:sonarqube-gradle-plugin:3.1.1"

// Module level gradle file

apply plugin: "org.sonarqube"
sonarqube {
    properties {
        property "sonar.projectName", "***specify project name***"
        property "sonar.projectKey", "***specify project name***"
        property "sonar.host.url", "http://localhost:9000"
        property "sonar.tests", ["src/test/java"]
        property "sonar.test.inclusions", "**/*Test*/**"
        property "sonar.sourceEncoding", "UTF-8"
        property "sonar.sources", "src/main/java"
        property "sonar.login", "***specify local server username***"
        property "sonar.password", "***specify local server password***"
        property "sonar.exclusions", '**/*Test*/**,' +
                '*.json,' +
                '**/*test*/**,' +
                '**/.gradle/**,' +
                '**/R.class'
    }
At the module level we may set our preferred credentials for the local server. By default, admin is set for both username, and password. And in the properties we can define our custom properties based on our project requirements.
For Local Server Setup, we need to follow the below steps one by one.
- Download SonarQube from the official site. After successful download we will get a SonarQube Zip folder. Unzip that folder. This folder is supported by all kinds of OS level machines like Windows, Mac, and Linux. In my case I am using a Windows OS machine.
- Once the Unzip process is completed, please open the wrapper class file. This file is available in the below path, SonarQube Unzip folder---> Conf --> Wrapper. In that wrapper class set the JDK (11.0) path of your system.

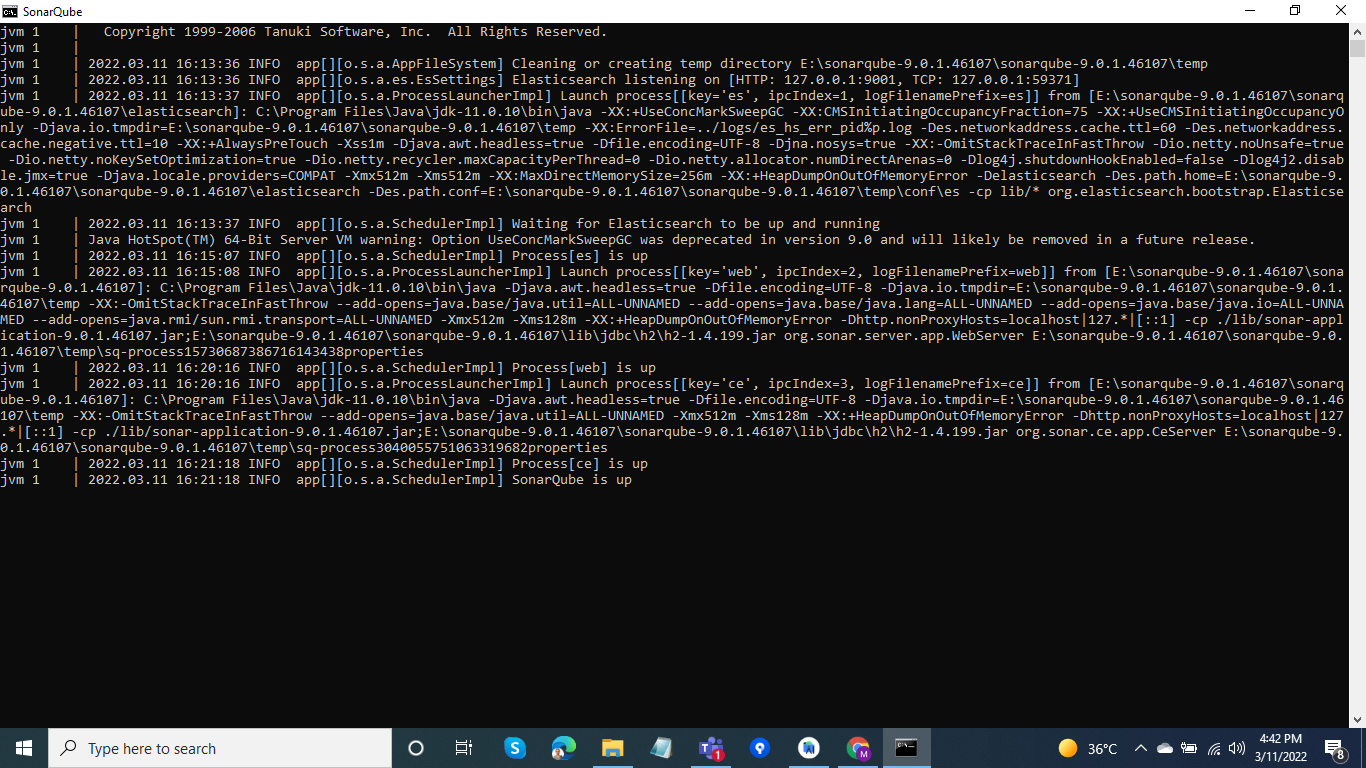
- Start the sonar window batch file. Follow the below path, to start the sonar SonarQube Unzip folder ---> bin ---> Select your machine OS (In my case windows) -->Start Sonar
- Once you started the Sonar it takes 2 to 3 mins to be ready (Server up). You may see the status of the Sonar. Once the server is up you may see the SonarQube is up message in cmd.
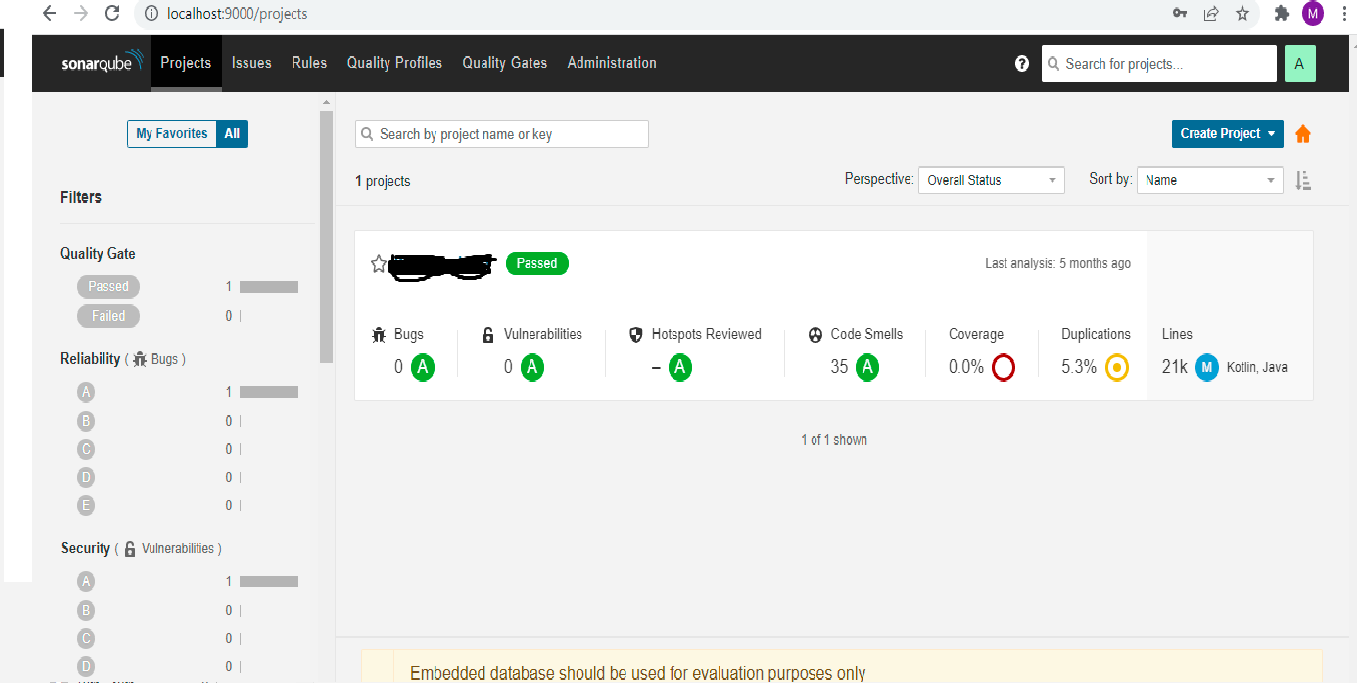
- Once the Sonar is up go to the Browser and open the default local host with the port 9000 (localhost:9000). If everything is done successfully you should analyze your project code and generate the quality report as well.
To Generate the Quality report, you should import the project to Server. You can import the Project from IDE or Through Cmd. If you want to import the project from cmd execute the below command, gradlew sonarqube -Dsonar.host.url=http://localhost:9000.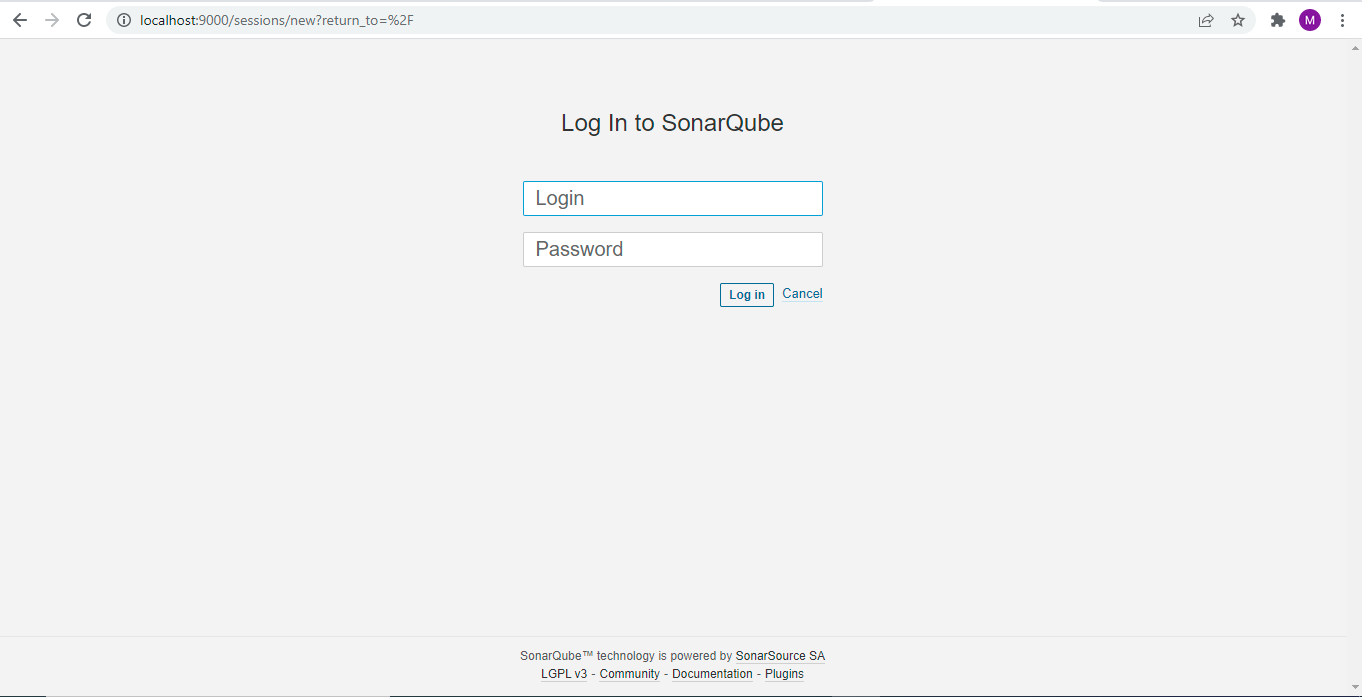 After executing the above command successfully without any errors you will see the project is imported in local server and you may generate the quality report if needed.
Commonly Faced Issues:
Below are the common challenges while working with the SonarQube:
- Unable able to start the Sonar
We might get this issue because of the below 2 reasons
1. JDK Path Setup
2. Already Started Sonar and JVM is still running in the background.
- Can't generate the Report Sometimes we may not generate the report of our project.
Solutions for the Above Issues:
- Please check the JDK version and the Path Setting in the wrapper class file as well as Env Variables.
- If you had already started Sonar and killed the process on command prompt, your JVM would still be running in the background. Kill the Java process and try again. To avoid this JVM bg running kind of issues prefer the stop sonar service once you are done with the sonar. Close the sonar smoothly using this shortcut (ctrl+c).
- Sometimes you may get previous report and not able to generate the report. In that case, please remove the existing project from the server and try to import the same again.
Conclusion:
The goal of SonarQube is to empower developers' quality and security of code point of view. Using SonarQube facilitates code quality control and decreases the number of real and potential bugs. So, Developers should focus on the business logic instead of checking code quality and all.

.png?width=150&height=150&name=content%20(1).png)