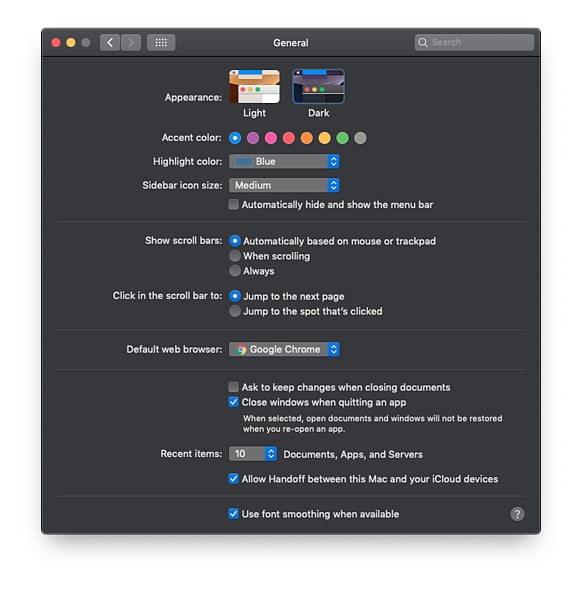
From macOS 10.14 and iOS 13 onwards, Apple has introduced a new type of appearance called Dark Mode. Users can choose or schedule system-level appearances from settings and can adapt to our application with minimal development changes. In this blog, we would be exploring and explaining the different aspects of the application that a developer needs to take care of while adapting Dark Mode or building a new application that is enabled with it. The main concentration will be on the following:
- Custom views where the view is completely customized within the application
- Colors, which includes all the existing and custom colors within the application
- Images/Assets, which form the exciting parts of the application
Custom Views
When user changes appearance from settings, system automatically asks each view and window to re-render itself. In this process, system will call several well-known methods to update the content and render according to the appearance. The below depicted table gives you the list of methods that will be invoked on appearance change. The system updates traitCollection property in UIView before calling these methods. By using userInterfaceStyle property in traitCollection, one can change appearance-sensitive changes to update the content.
self.view.traitCollection.userInterfaceStyle|
Class |
Appropriate Methods |
|
NSView |
updateLayer() |
|
UIView |
traitCollectionDidChange(: ) |
|
UIViewController |
traitCollectionDidChange(_: ) |
|
UIPresentationController |
traitCollectionDidChange(_: ) |
Adopt to Colors
When every interface appearance changes, select right colors to adopt automatically. Light and dark interfaces use very different color palettes. Colors that work well in a light appearance may be hard to see in a dark appearance and vice versa.
There are two ways to adopt color objects and they’re as follows:
-
Semantic Colors
NSColor and UIColor has predefined color objects, which will render the color depending on the current appearance settings. For more details please refer https://developer.apple.com/design/human-interface-guidelines/ios/visual-design/color
let label = UILabel() label.text = "Semantic colors" // Depending on the setting systemGray6 will give the appropriate gray color label.textColor = .systemGray6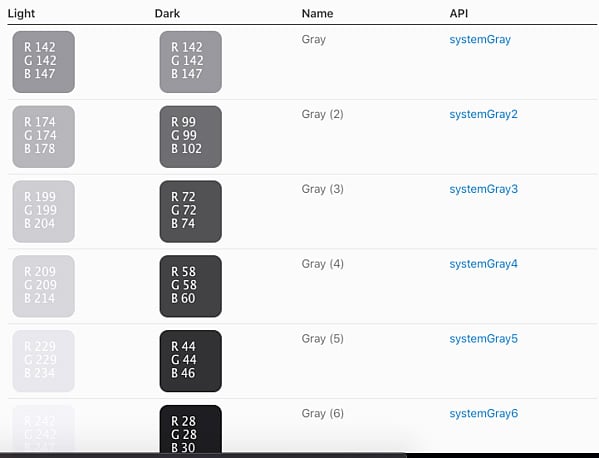 Image Courtesy: Apple Developer Human Interface
 -
Custom Colors
One can configure color asset in Xcode's asset editor, create color asset and specify the colors to render in Light and Dark Mode. One can choose any appearances to set the color for older version by selecting appropriate appearance options.
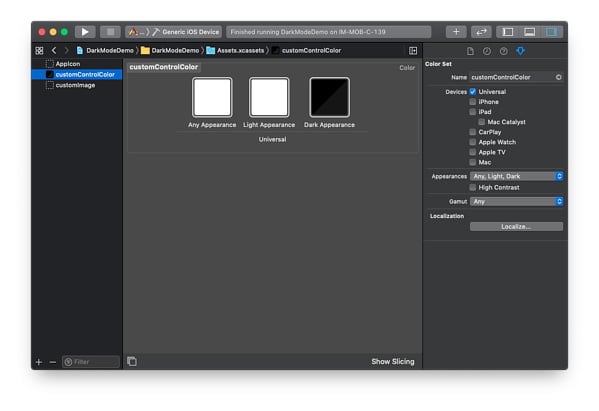
To load a color value from an asset catalogue, load the color by name:
//macOSlet aColor = NSColor(named: NSColor.Name("customControlColor"))
//iOS
let aColor = UIColor(named: "customControlColor")
When we use color asset to create color object, we don’t need to recreate the color object on appearance changes in settings. It also applies to semantic colors.
Adapt to Images
One might use different images in their application for buttons, image views, custom views and other UI elements. Make sure the images in interfaces looks good in both appearances. If your image is difficult to view in any of the appearances, you need to update the image accordingly.
There are three types of images that we usually use in our applications. And, they are as follows:
-
Symbol Images
There are some places where you would usually combine images and texts to form icons. Symbol images are vector based images and can be used for rendering simple shape or glyph. Symbol images have several advantages:
- They scale without losing any of their sharpness
- You can tint them with an appropriate color
- They include a baseline for layout with text
- You can configure them with font-related style information to make them appear as if they belong to that font
-
Template Images
A template image is a bitmap image where only the opacity of the image matters. Typically, one uses template images to represent iconic shapes. You might use templet images for play or pause icons. When one adds a template image to a button or image view, they specify a tint color. The view applies the tint color to every pixel that doesn't have an alpha of 0.0 causing the image's shape to adopt to that color. To support different appearances, change the tint color.
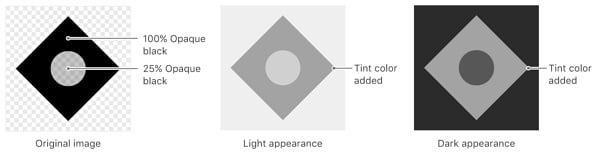
Image Courtesy: Providing Images for Different Appearances | Apple Developer Documentation -
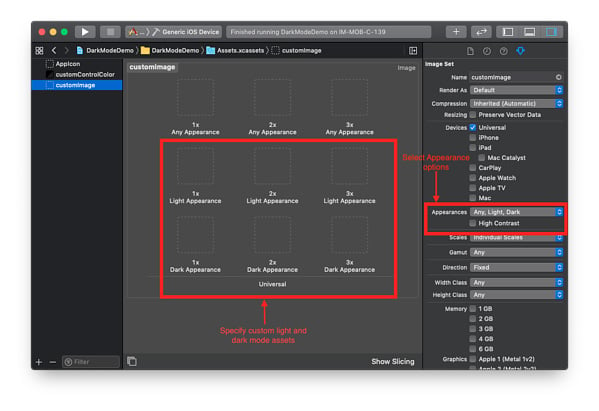
Custom Images
You can configure image asset in Xcode's asset editor, create image asset and specify the image to be rendered in Light and Dark Mode. You can choose any appearance to set the image for older version by selecting appropriate appearance options. While drawing, the system automatically draws the appropriate variant based on the current settings. When the settings change, the system redraws the image with new settings.
Opt Out of Dark Mode
System, automatically, opts out any applications linked against iOS 13 or later SDK version to both Dark and Light Mode appearances. Supporting the Dark Mode is not mandatory for your application. If you need some time to upgrade your application, you can disable Dark Mode by including UIUserInterfaceStyle with a value of Light in info.plist file. If you include this, system will ignore appearances settings for the application.

Sometime, one may want to render their view, view controller or window in Light mode or Dark Mode. We can achieve it by simply setting overrideUserInterfaceStyle property of the appropriate window, view, or view controller to that style. Overriding the interface style affects other objects in interface as mentioned below:
- View Controllers — The view controller’s views and child view controllers adopt the style
- Views — The view and all of its sub views adopt the style
- Windows — Everything in the window adopts the style, including the root view controller and all presentation controllers that display content in that window
override func viewDidLoad() {
     super.viewDidLoad()
      // Always adopt a light interface style.
      overrideUserInterfaceStyle = .light
 }
Conclusion
Early adoption of Dark mode for your application is commendable as it will give good user experience. Apple is strongly recommending to implement Dark Mode for your apps.
About Innominds
Innominds is a leading Digital Transformation and Product Engineering company headquartered in San Jose, CA. It offers co-creation services to enterprises for building solutions utilizing digital technologies focused on Devices, Apps, and Analytics. Innominds builds better outcomes securely for its clients through reliable advanced technologies like IoT, Blockchain, Big Data, Artificial Intelligence, DevOps and Enterprise Mobility among others. From idea to commercialization, we strive to build convergent solutions that help our clients grow their business and realize their market vision.
Interested! For any demos or project discussions, please write to us at marketing@innominds.com to know more about our offerings