When it comes to start a react project, we all use the familiar create-react-app by Facebook engineers. This create-react-app stores the logic to use, Babel and Webpack behind the scene to make our React application work in the browser.
Did you know that you can also configure a React app, without using create-react-app? Here’s how.
But first let’s familiarize ourselves with we start Webpack and Babel.
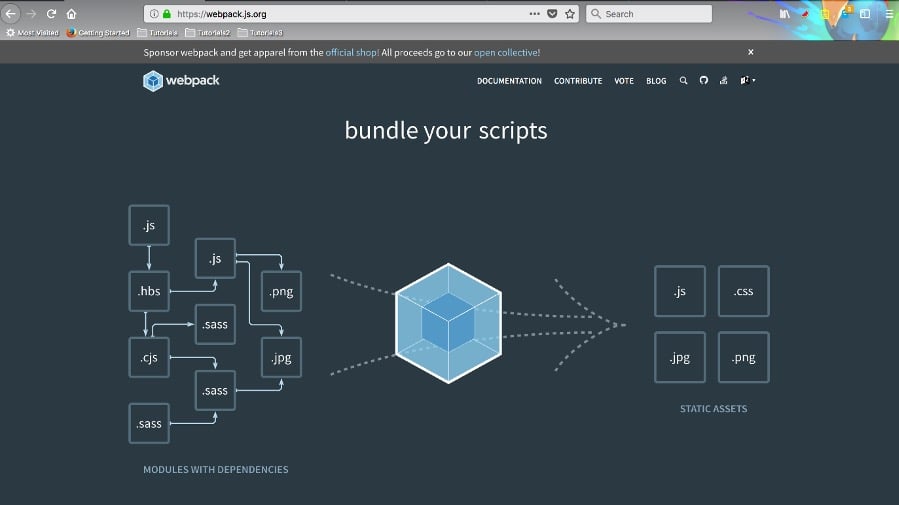
Webpack is a module builder. It should be noted that webpack doesn’t run during your page load, but it runs during development.
Look at the below diagram from the website. It is self-explanatory on what webpack does. As shown on site, it takes your “js”, “sass” and other dependencies files and converts them to plain “js”, “css”, “jpg” and “png” files which the browser can understand.
When we create an app with create-react-app, webpack is included in it and because of it in React we are able to use different components without worrying about the scope. And also our “scss”, “jsx” files getting converted into “css” and “js”.
Webpack
Babel is a JavaScript compiler that converts edge JavaScript (ES6) into plain old ES5 JavaScript that can run in any browser (even the old ones). In the React world it is used to transform the JSX code into vanilla JavaScript. The Babel website lists what you can do with Babel:
- Transform syntax
- Polyfill features that are missing in your target environment
- Source code transformations (codemods)
A simple example of what Babel does for arrow function.
// Babel Input: ES2015 arrow function
[1, 2, 3].map((n) => n + 1); // Babel Output: ES5 equivalent
[1, 2, 3].map(function(n) {
return n + 1;
});
Below is how a React JSX line gets converted into React createElement. In the first version of React, we used to write the confusing createElement way.

Babel
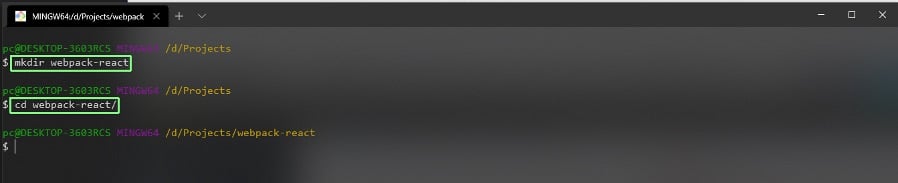
Let’s start our configuration now. We will first create a folder webpack-react and cd into it.
webpack-react
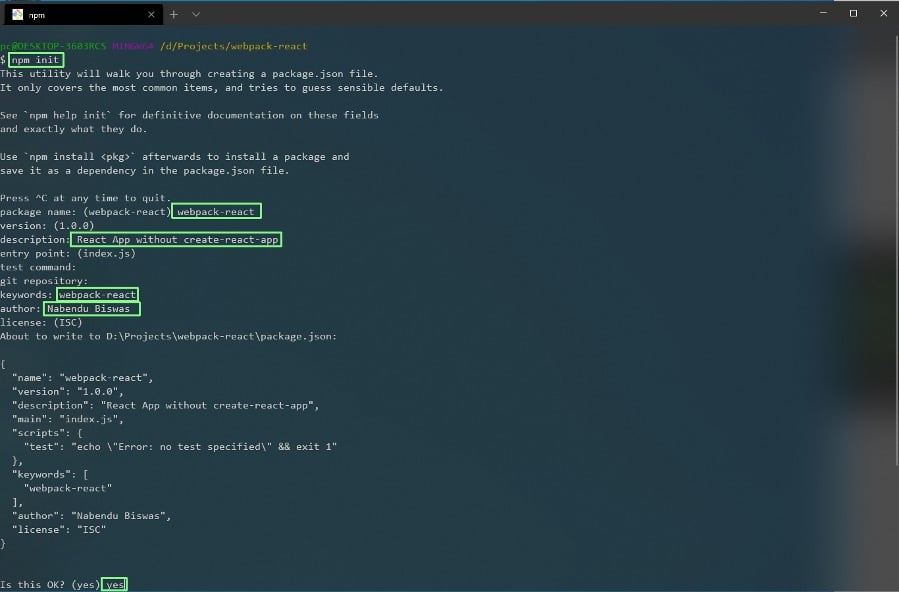
Next, we will do npm init in the terminal, as all react app are basically NodeJS based. It will ask us some questions. We can leave most of them blank by pressing enter. We should keep the package name the same as the folder name and the rest are optional.
After the last option, you have to type yes.
npm init
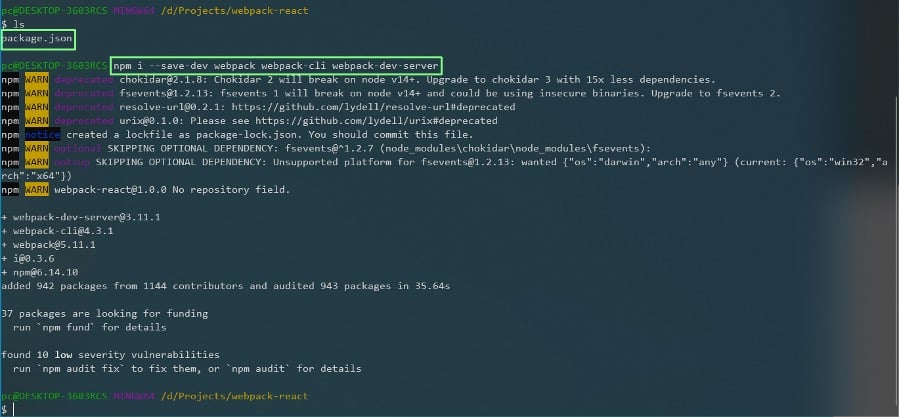
And it will create a package.json in our directory. Now, we need to install some npm packages, before moving forward. The first packages we are installing are for webpack itself by below command. Notice, that we are installing it as a dev dependency, which means it will not be installed in production.
npm i --save-dev webpack webpack-cli webpack-dev-server
webpack
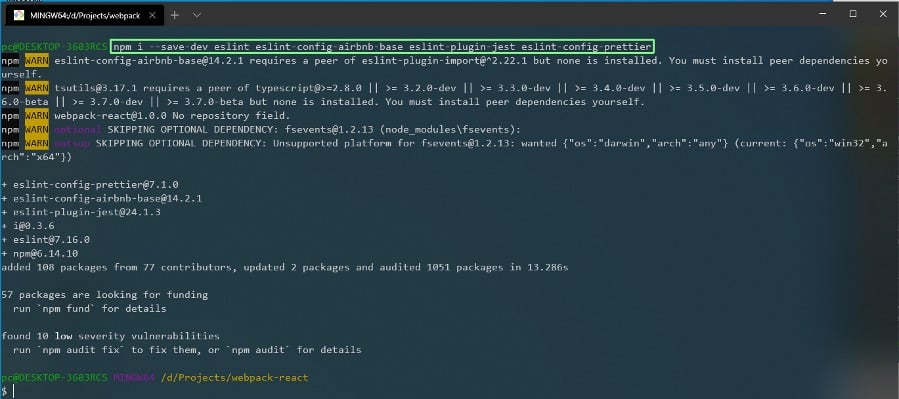
Now, we are going to install a bunch of eslint packages. Eslint is basically a linter, which helps us to write good code and will highlight the error in our code editor, if we are not doing it correct. We are using the eslint of airbnb base, as it has become the de-facto standard.
npm i --save-dev eslint eslint-config-airbnb-base eslint-plugin-jest eslint-config-prettier
eslint
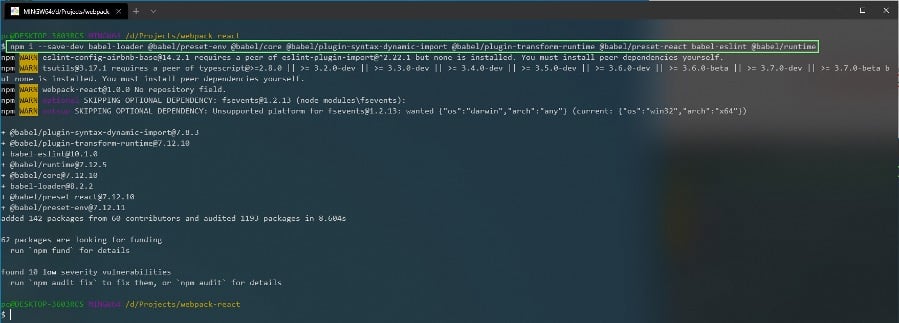
Now, we are going to install a bunch of babel plugins. Babel is very important to convert ES6 into ES5, which is still required in old browsers. And also the jsx react code to createElement react code.
npm i --save-dev babel-loader @babel/preset-env @babel/core @babel/plugin-syntax-dynamic-import @babel/plugin-transform-runtime @babel/preset-react babel-eslint @babel/runtime
babel
Now, it’s time to install react and react-dom in our project.
npm i react react-dom

react
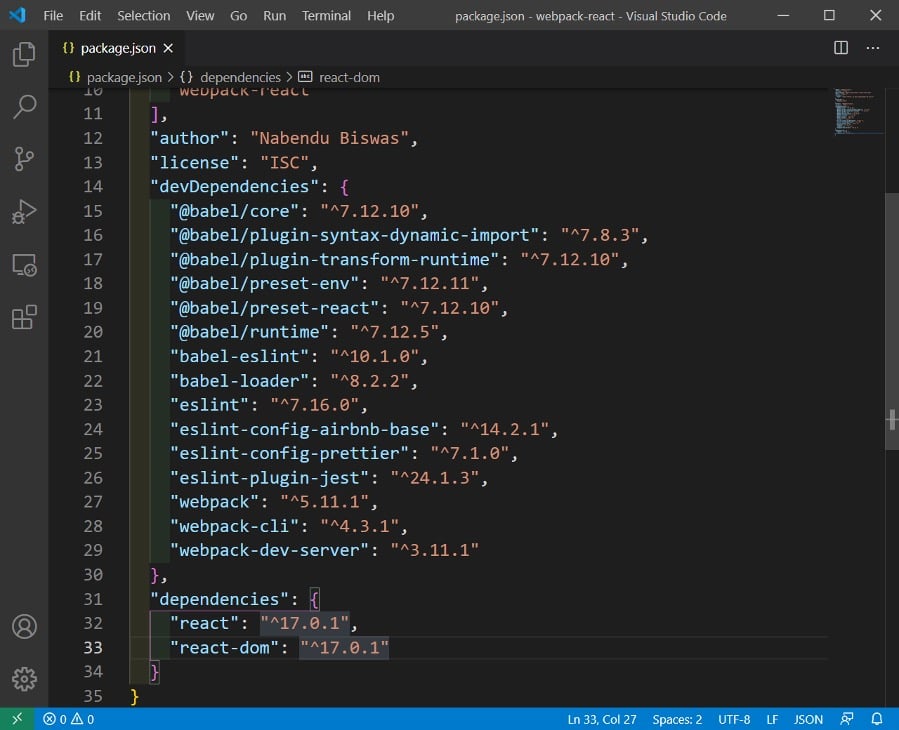
Now, we will open our project in VS Code, we can see all the dev dependencies and dependencies in the package.json file.
package.json
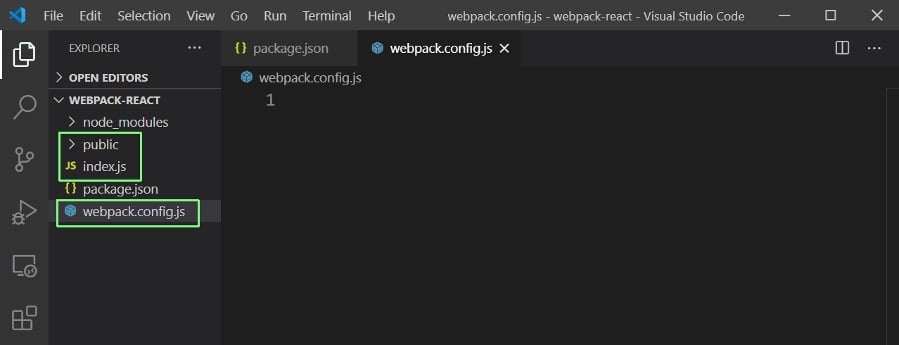
Now, we need to create a webpack.config.js file in the same directory. This file basically tells us how to bundle the complete project in a simple file.
We will also create public folder and a index.js file in the same directory.
configuration
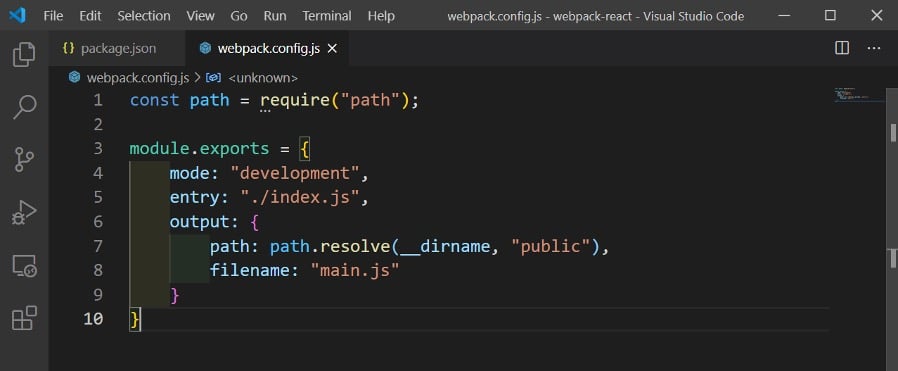
We will now start to write our webpack configuration in webpack.config.js file. Here, inside module.exports we are first telling the mode as development. After that the entry point of our project which is index.js.
Next, the output of our project which will be main.js inside the public folder. To get the relative path, we will be importing the path at line 1 and also using it within our output object.
We are basically telling, webpack take all the things that are present in index.js, along with the dependencies that are imported in index.js and produce a file main.js and put it in public folder.
webpack.config.js
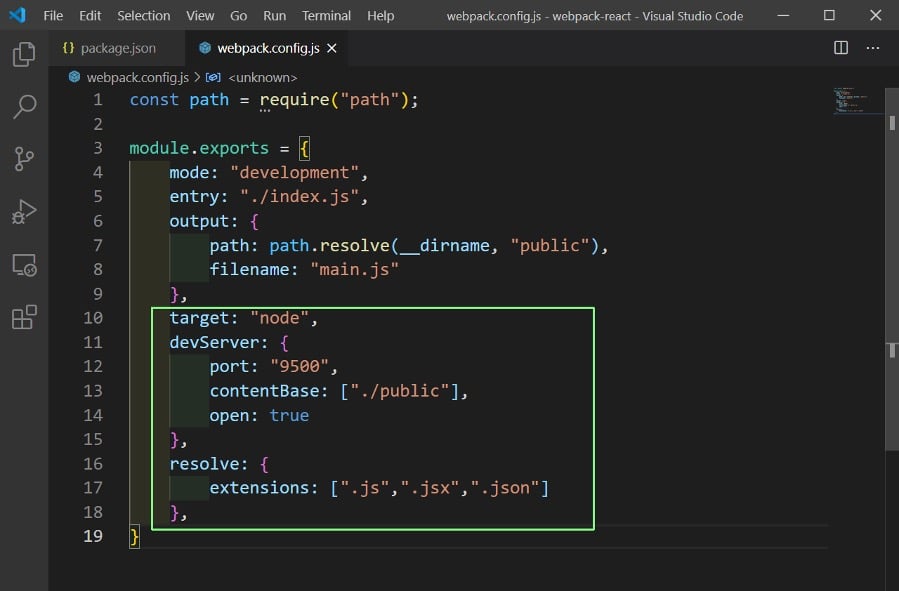
Next, we will first mention that the target is a node application. After that we will put configuration for devServer. Here, we can mention any port for our application to run, then the content is from public folder.
We are also resolving few file extensions, as we need to tell webpack what kind of files it needs to take to produce the final output.
webpack.config.js
We also need a babel configuration file, before creating some rules in our webpack.config.js file. So, create a file .babelrc in the root directory and the below content in it.
It is a sample babel configuration which allows us to use configuration of presets and some plugins for the transformation.

.babelrc
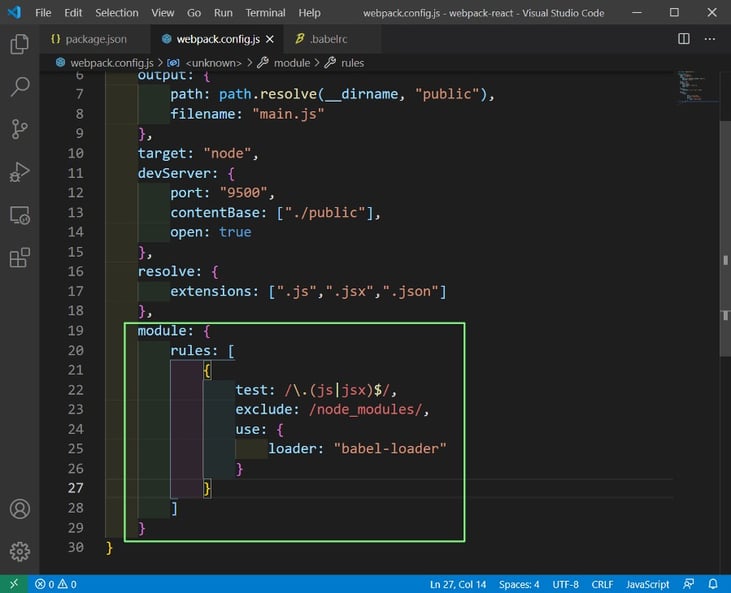
Now, we will write rules for webpack in our webpack.config.js file. So, we will create a module and inside it a rules key, whose value is an array.
We are first telling what kind of file extension this rule should look for and apply in test, whose value is a regular expression which gives as js or jsx files.
Next, we want our nodule_modules folder to be excluded of these rules because the creator of every npm package has already applied these rules.
Now, we need to mention the loader which we are going to use. Here it is the babel-loader.
webpack.config.js
Our webpack.config.js file is now complete. Let’s again understand what this file does.
We are basically telling webpack to take index.js from entry. Then check for all file extensions in resolve. After that apply all the rules in module.rules and produce the output and place it in main.js in the public folder.
Next, create a file App.js inside a newly created src folder and index.html inside the public folder. Our folder structure is looking a lot similar to what create-react-app gives us.
In index.js we will first import react and react-dom both of which are required in a React project. After that we import the App file.
Now, the code in Line 5, tells take everything in App and render it in a root element. Notice that we are using document.getElementById from JavaScript DOM.
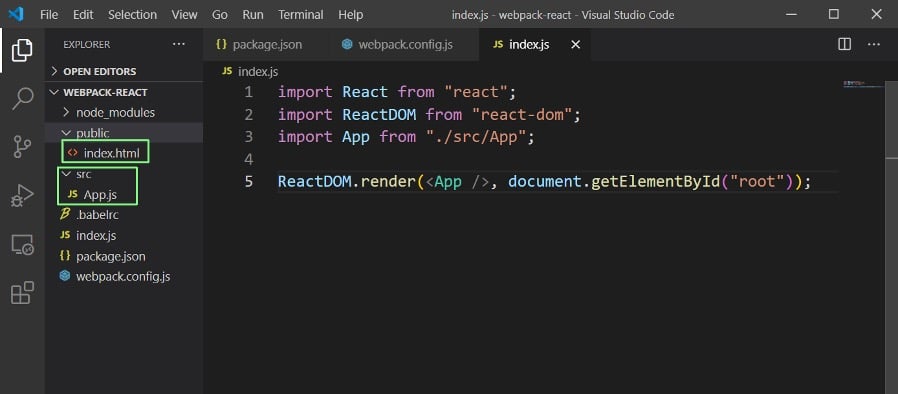
index.js
Next, we are going to create this root element in index.html file. First generate the html boilerplate by ! and pressing tab.
After that change the title and create a single div with id of root. Now, we will also create a script which will load main.js file.
We still don’t have the main.js because it will be created by webpack which will convert all of this complex react code to javascript.
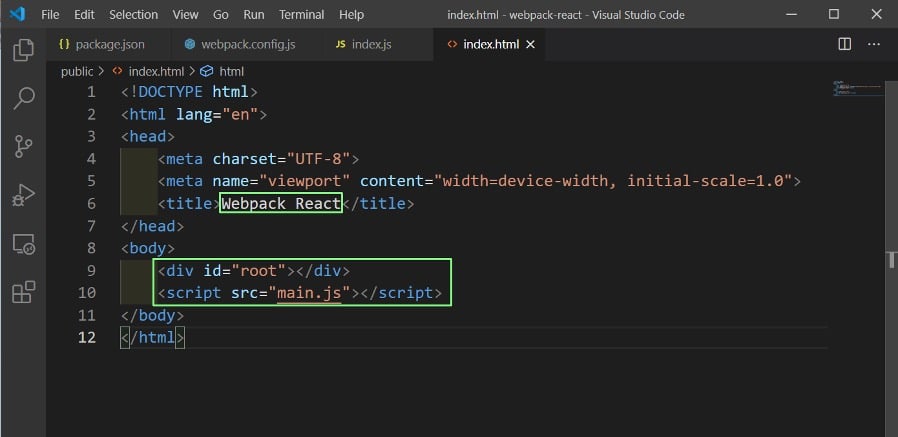
index.html
We are then left with writing the code for App.js file. Here, we are creating a simple functional component which outputs an h1 Hello Webpack React text.
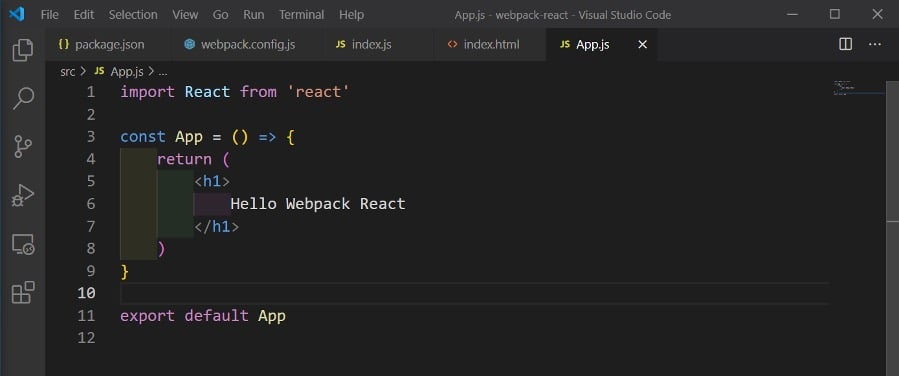
App.js
Before testing our project, we need some node scripts in our package.json file. The start script asks to run the webpack-dev-server in our current project at port 9500, from the public folder.
The build command asks us to build this package in main.js file. It actually runs all logic in webpack.config.js file.
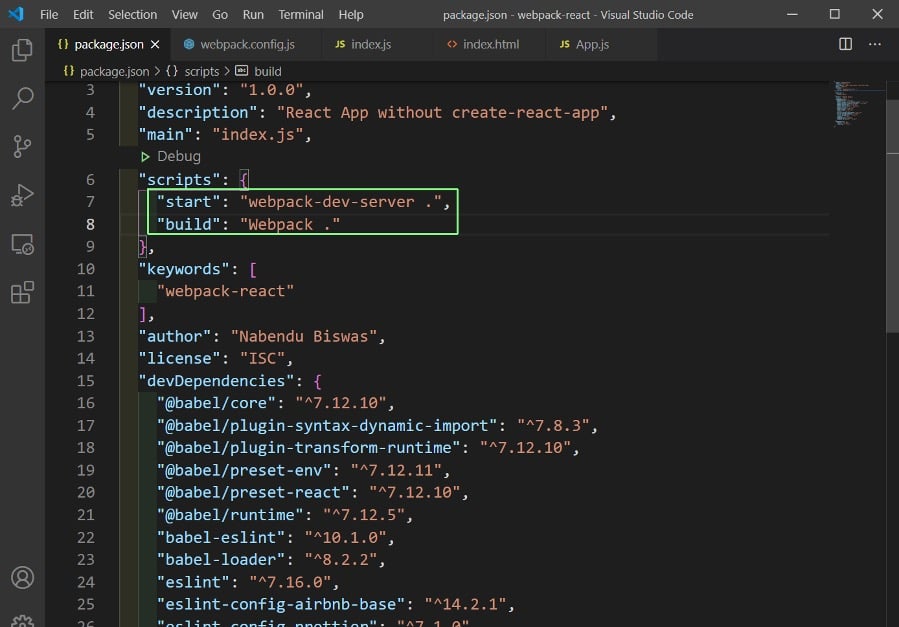
package.json
When we will test our first command npm run build in terminal and we will get an error.
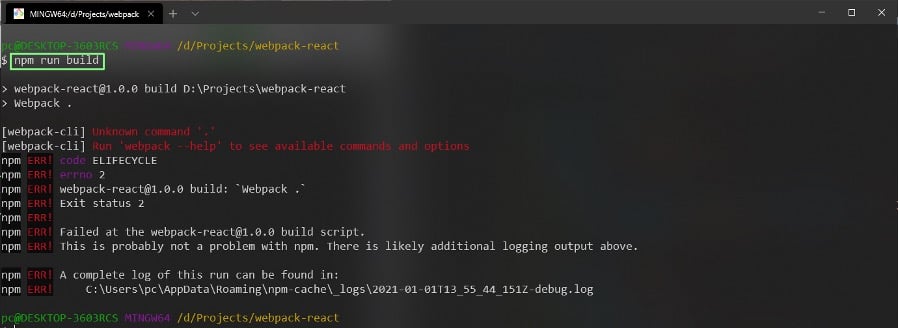
npm run build
Actually, there is an issue at the time of writing this post with current version of webpack. So, we will go back to the earlier version by changing it in package.json file.
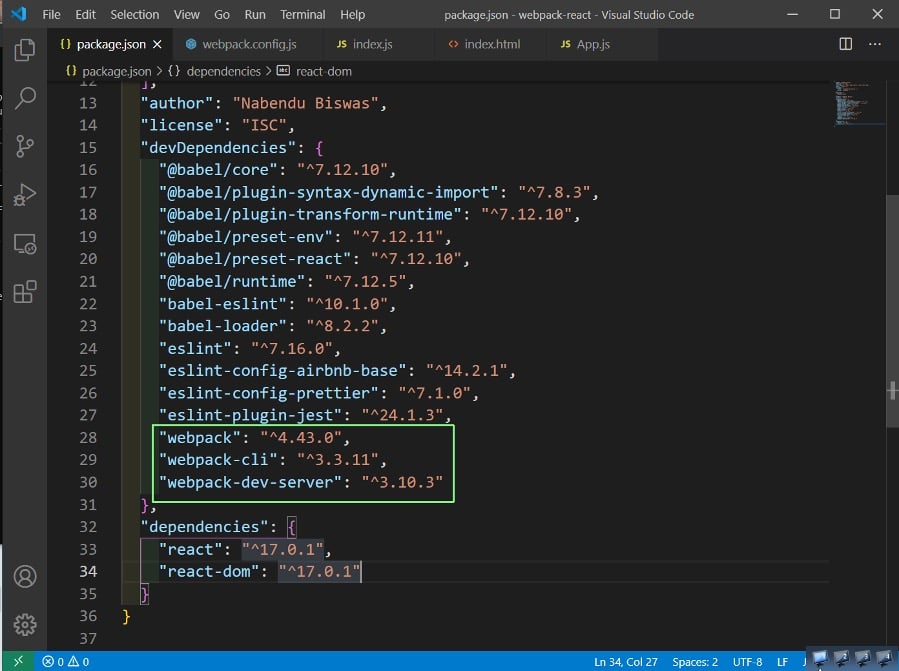
package.json
To install these new packages, we have to do npm i in the terminal which installs all the packages from package.json file in our project.
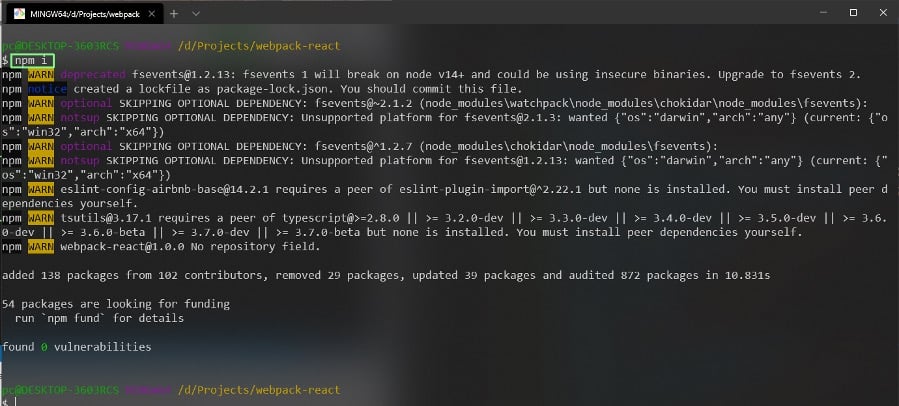
npm i
Now, our npm run build is a success.
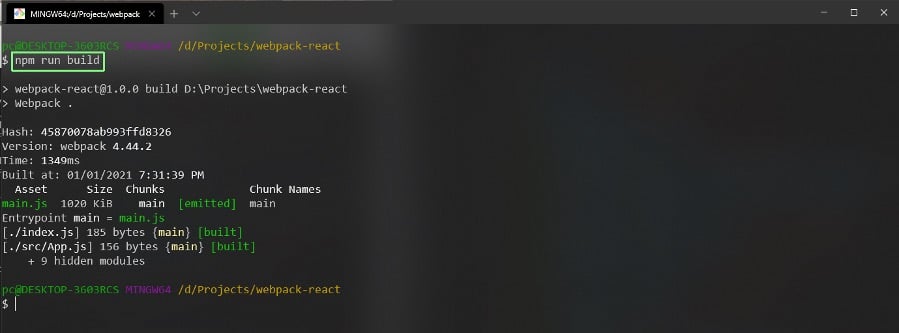
npm run build
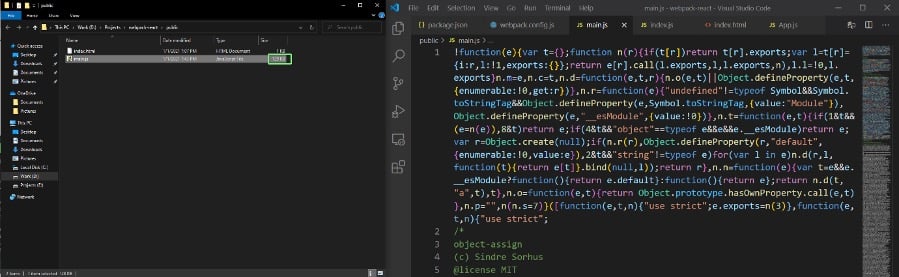
And it generates this huge main.js file in our public folder. The file is actually 1019 KB (1 MB) in size. This is our development build.
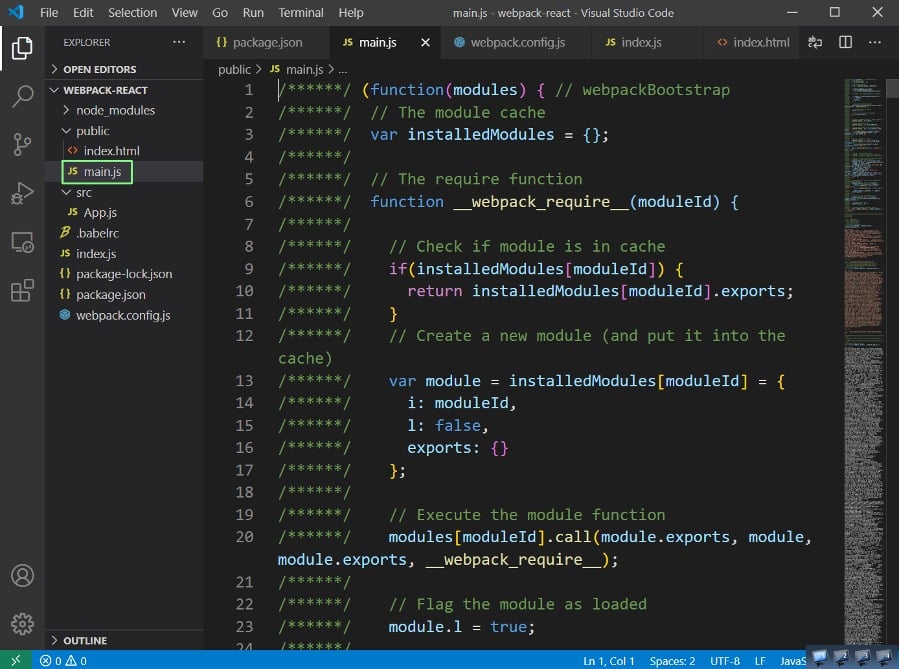
main.js
Now, we will see whether our application will run, by giving npm start from terminal.
Giving the command starts our dev server in http://localhost:9500/
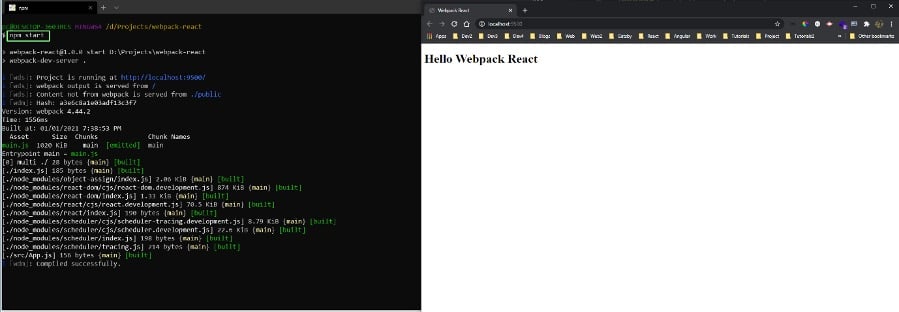
npm start
We will convert this into a production build by changing the mode to production in webpack.config.js file. We have also deleted the main.js file from public folder.
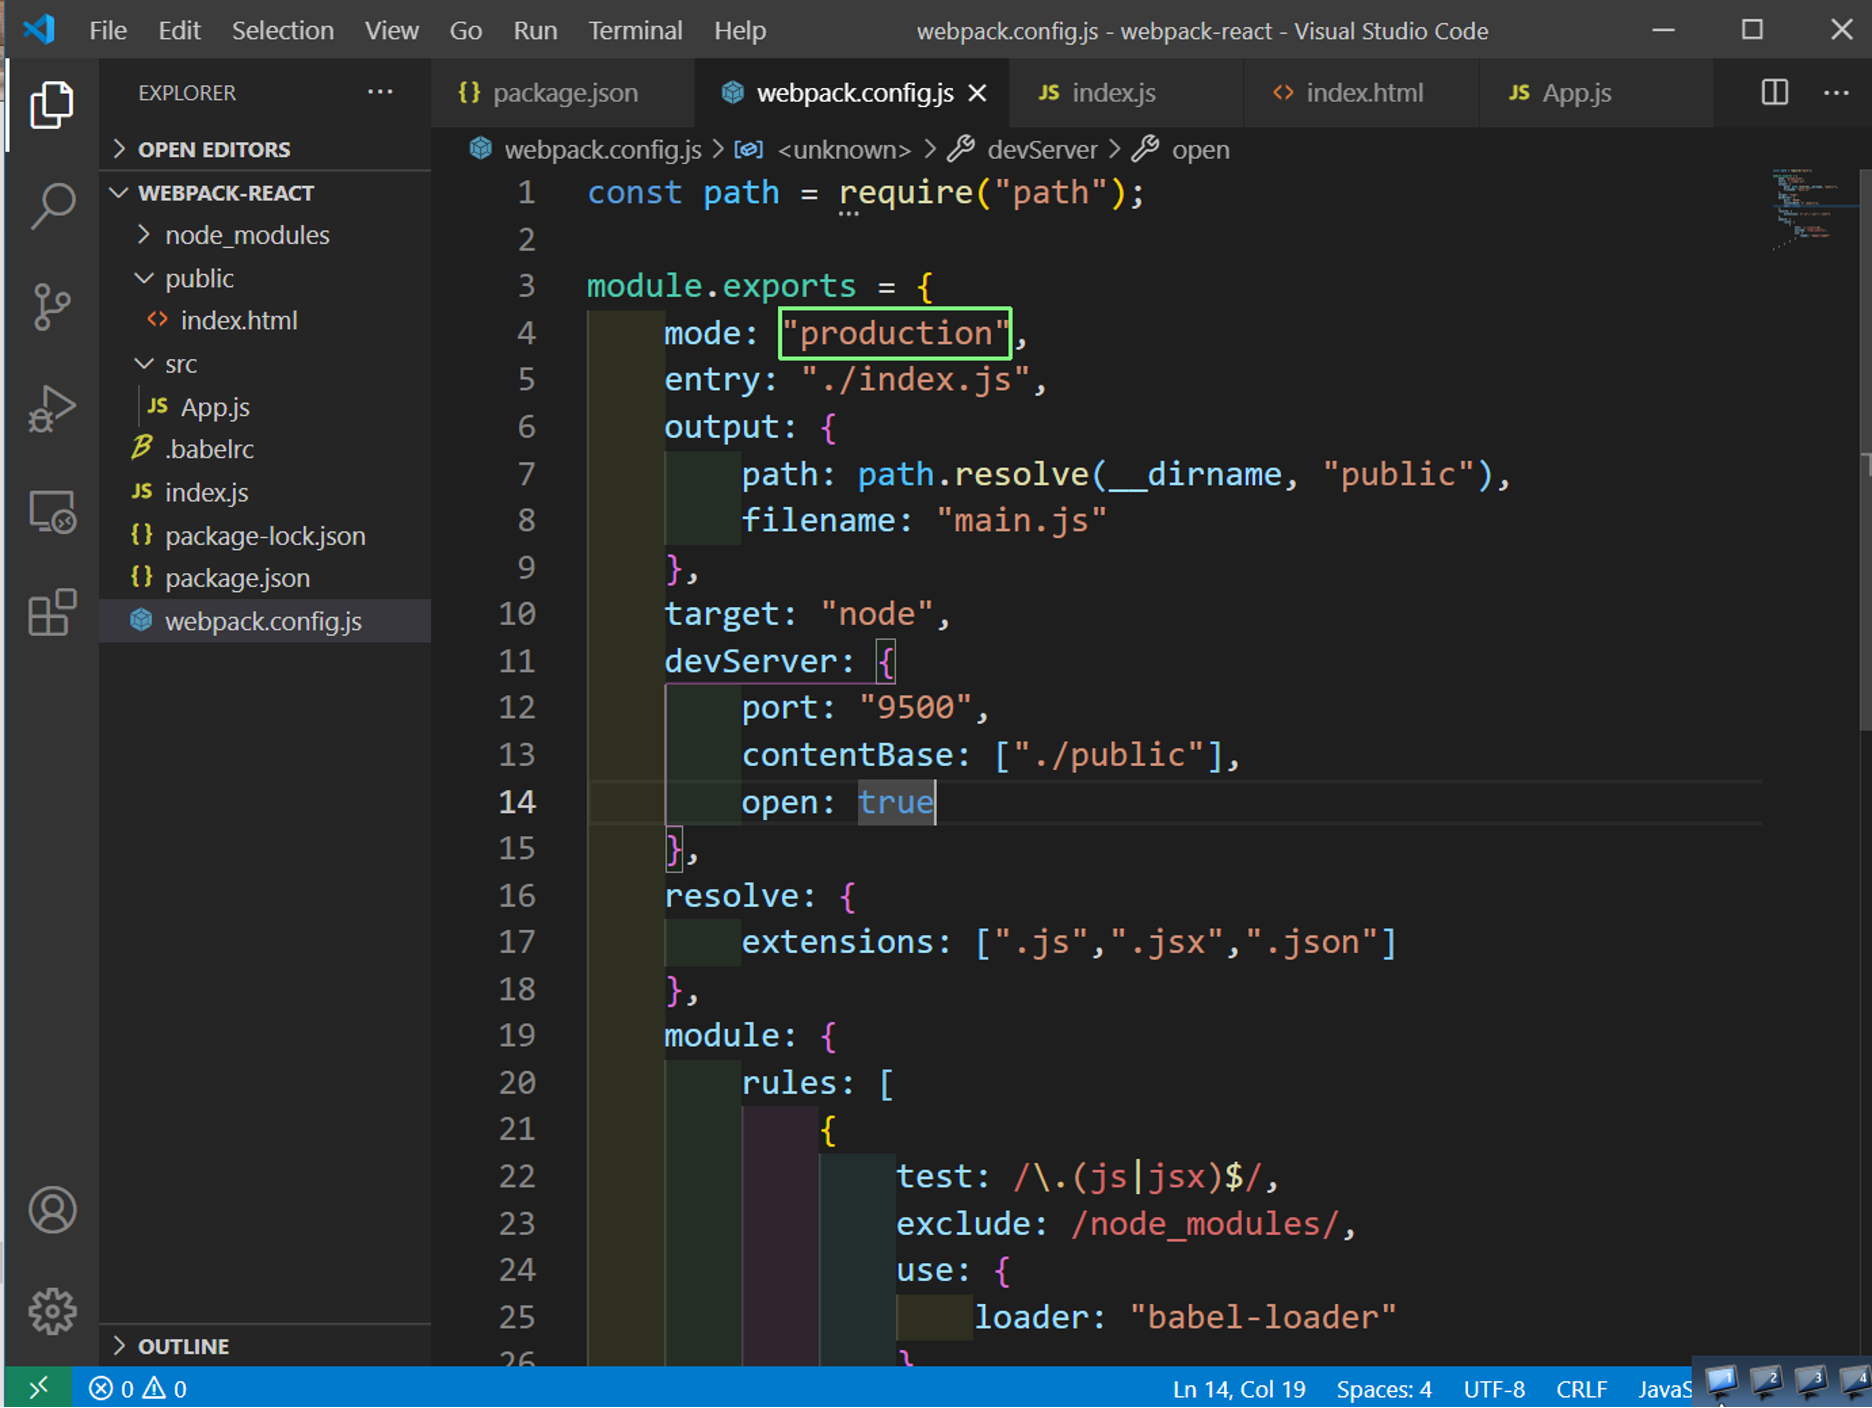
webpack.config.js
Run the npm run build command in the terminal to generate a new main.js file once again
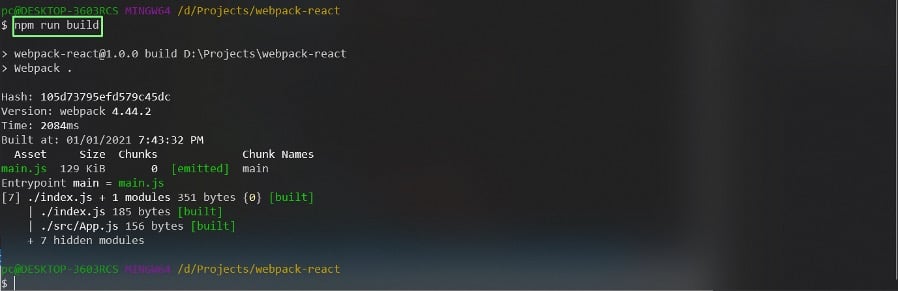
build
If we check the size of main.js file it’s only 129 KB and the file is also completely minified.
main.js
With the optimization from 1019 KB to 129 KB, we might want to use production build always. But, we should use development mode while doing development because the hot reloading is faster in development mode.
This completes our easy way to create a react app. Hope, you guys use it in your next build instead of create-react-app.
The code for the same is in this github repo.