Have you ever thought how testers test their own codes? Or, the methods put into practice by them to test before releasing code for testing? Well, the simple answer to all these questions is Unit Testing. It is one of the testing techniques and is a component of Test Driven Development (TDD). Using this technique, we can test independent methods, modules, interfaces and validate if it has any issues in the development phase. The main use of the Unit Testing is to identify, analyze and fix the defects before our application jumps into the production or goes live. Unit Testing can be developed and executed by the developer. It should handle both positive and negative scenarios. We can gain more with Unit Testing when compared to manual testing because before making the application live, it has to be tested in all environments like Dev, QA, and Beta. If implemented properly, Unit Testing can save vast amount of money and time. It ensures that developer’s source code meets the actual requirement.
Unit Testing Benefits
-
Making Process Agile: This is one of the main advantages of Unit Testing. When we add more features to the software, one may need to change the old code and design. However, changing the already tested code is full of risks. But if we have Unit Test cases, we can do code refactoring more confidently.
-
Increased Confidence: Unit Testing increases the confidence required in maintaining the code. Suppose we have to write Unit Test cases, if we run these before software is made live because of any defect or code change, we can promptly find defects that come to surface with the latest changes introduced.
-
Reusability of Code: In order to make Unit Testing possible, code needs to be modular and reliable.
-
Quality Assurance In the Code: Unit Testing improves the quality of code. Unit Test cases identify every defect that may have come up before the code is sent to production testing.
-
Debugging: Unit Testing simplifies the debugging process. If the Unit Tests case fails, it means that the latest changes done over code needs to be debugged.
-
Cost-effective: The cost of fixing defects during Unit Testing is less when compared to the defects detected at higher levels. Time and effort involved in finding a defect during the acceptance testing or making the software live, becomes easier.
Unit Testing Tips
- Find a tool that supports your development language (C#).
- Identify the tests, which can impact your application’s behavior and implement it first. Next, expand the unit tests to cover remaining parts in the software.
- Separate the development environment from the test environment.
- Use relevant and accurate test data. If there is a production data in the application, try the test data that is much closer to the production data.
- When Unit Tests identify the defect before fixing it, write a Unit Test that exhibits the defect. The reasons being:
- The defect can be caught later if it is not properly fixed by the developer
- The test suite will be full and comprehensive
- After the developer fixes the defect, he/she probably becomes too lazy to write the test. So, test suite will fail repeatedly
- Unit Test cases should be independent from each other test cases. For example, if a class depends on a database class, to test the class, create an abstract interface to the database class and use the mock object for the interface implementation. Do not directly write a case that interacts with the database class.
- Cover all the corner use cases, which includes negative scenarios and implement it. Concentrate more on conditional statements.
- Version controls could be a good practice to keep track of your test scripts.
- Cover performance test cases for the code in addition to behavior test cases.
- For each release, execute Unit Tests suite to get the comprehensive software.
Prerequisites
Here, to achieve Unit Testing, we are going to use XUnit and NSubstitute - tools from Microsoft technologies.
xUnit
xUnit.net is a free and open source Unit Testing tool for the .NET Framework. xUnit is written by the original inventor of NUnit v2. xUnit.net is the latest technology for Unit Testing C#, F#, VB.NET and other .NET languages. xUnit.net works with ReSharper, CodeRush, TestDriven.NET and Xamarin. It is a part of the .NET Foundation and operates under their code of conduct. It is licensed under Apache 2 (an OSI approved license).
|
Tools |
Version |
Reference |
License |
|---|---|---|---|
|
xUnit |
2.3.1 |
https://xunit.github.io/ https://www.nuget.org/packages/xunit/ |
|
|
xunit.runner.console |
2.3.1 |
||
|
NSubstitute |
3.1.0 |
http://nsubstitute.github.io/ https://www.nuget.org/packages/NSubstitute |
https://github.com/nsubstitute/NSubstitute/blob/master/LICENSE.txt |
|
OpenCover |
4.6.519 |
https://github.com/OpenCover https://www.nuget.org/packages/opencover |
https://github.com/OpenCover/opencover/blob/master/License https://github.com/OpenCover/opencover/blob/master/build/nantcontrib-0.85/license.txt |
|
ReportGenerator |
3.1.1 |
https://github.com/danielpalme/ReportGenerator https://www.nuget.org/packages/ReportGenerator/ |
https://github.com/danielpalme/ReportGenerator/blob/master/LICENSE.txt |
NSubstitue
NSubstitute is designed as a friendly substitute for .NET mocking libraries. It is an attempt to satisfy our craving for a mock library with a succinct syntax that helps us stay focused on the intent of our tests, rather than on the configuration of our test doubles.
For reference: http://nsubstitute.github.io/help/getting-started/
Getting Started
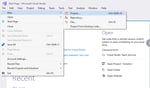
Here, I am creating sample Unit Test project with the name as XUnitSample.Test
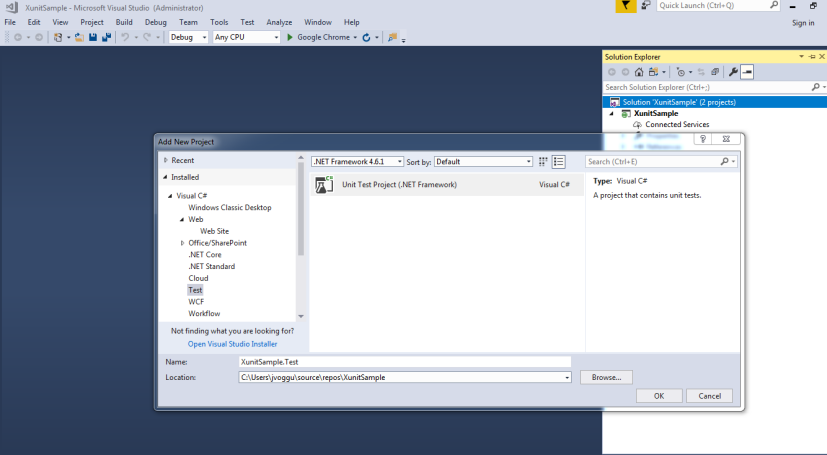
Add xUnit to Our Test Project
The best approach to add xUnit framework to our project is by using NuGet. Below screenshots explain the process of adding xUnit framework to our application.
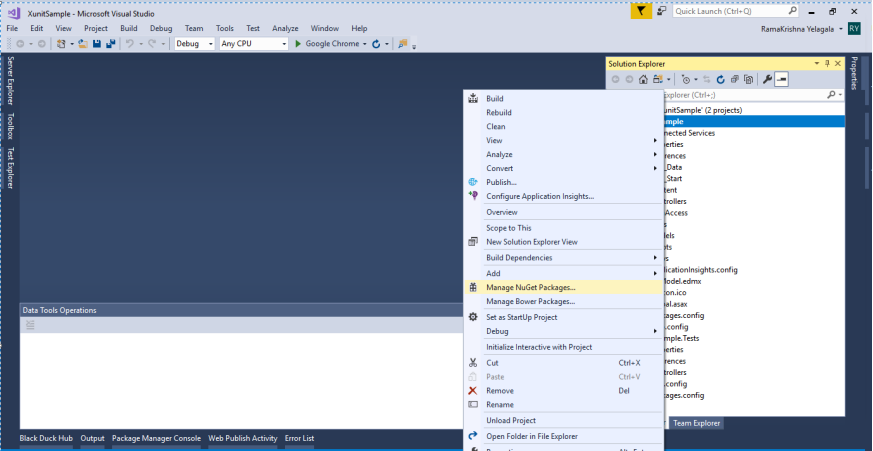
Right click on the project and choose Manage NuGet Packages option. Check below screenshot for details.
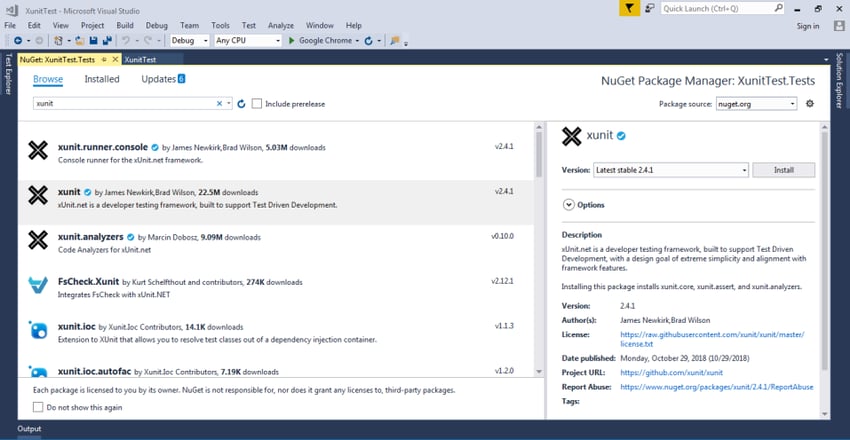
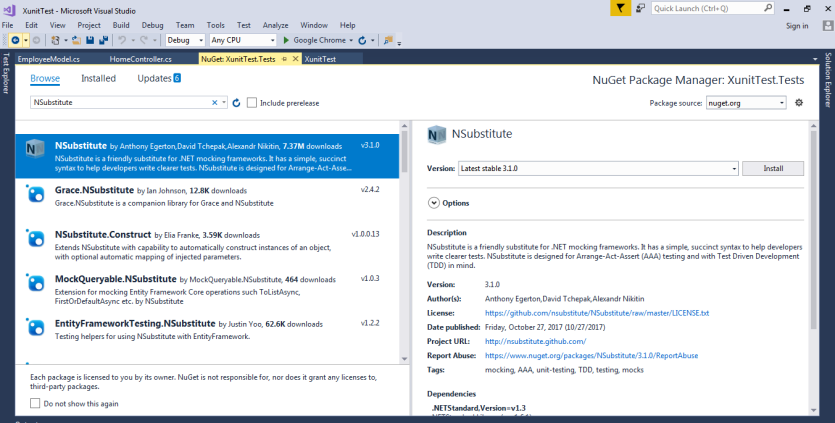
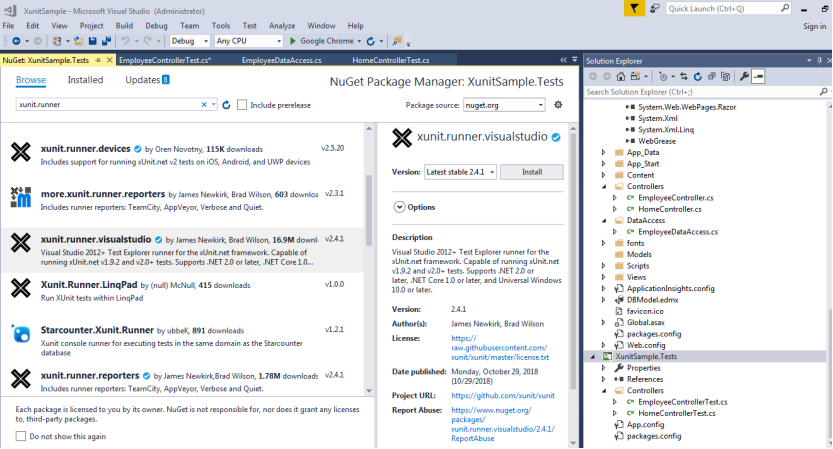
In the NuGet Manager screen, type xUnit in the search box and hit enter. We can get xUnit tool. Select it and press the ‘Install’ button. Check below screenshot for details.
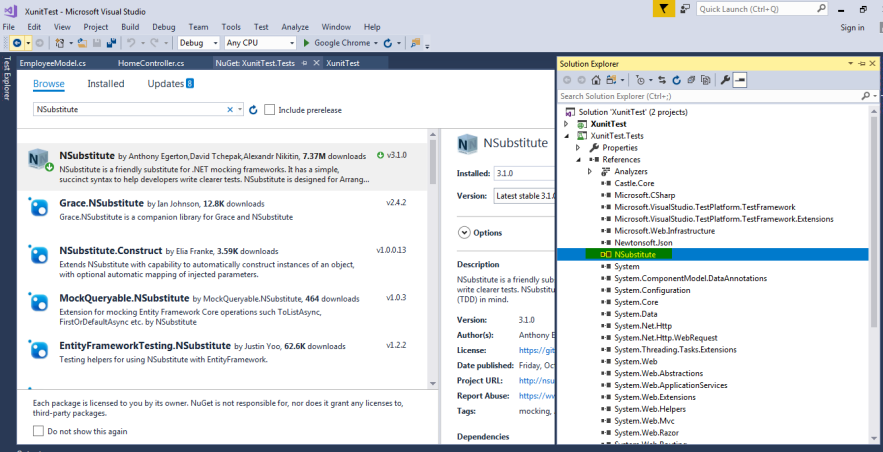
After a successful installation, xUnit will be added to our project. Check below screenshot for details.
Add NSubstitute to Our Test Project
Like xUnit installation, use NuGet option and install NSubstitute.
Here, I am using Entity Framework 6.0 for DB interaction.
Here is DataBase Table I used for this sample project.
CREATE TABLE [dbo].[Employee] (
   [Id]        INT           IDENTITY (1, 1) NOT NULL,
   [FirstName] NCHAR (10)    NULL,
   [LastName]  NCHAR (10)    NULL,
   [MobileNo]  NCHAR (10)    NOT NULL,
   [Email]     NVARCHAR (50) NOT NULL,
   [Address]   NVARCHAR (50) NULL,
   PRIMARY KEY CLUSTERED ([Id] ASC)
);
Below is the Edmx file, which I generated using entity framework.
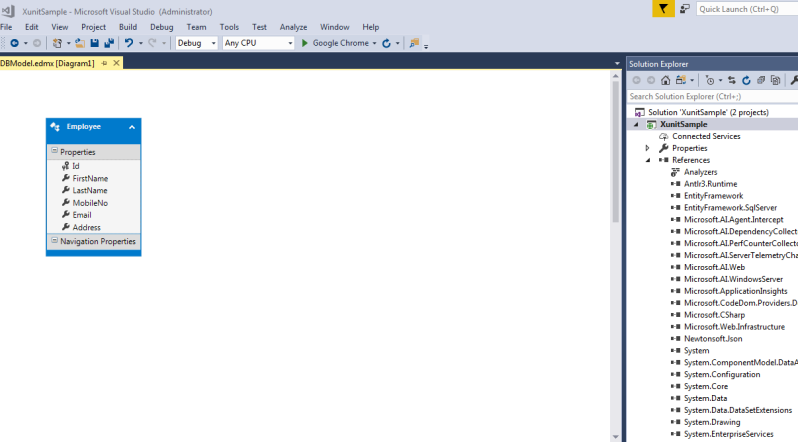
Below is the model generated by Entity framework for the Employee table.
public partial class Employee
    {
        public int Id { get; set; }
        public string FirstName { get; set; }
        public string LastName { get; set; }
        public string MobileNo { get; set; }
        public string Email { get; set; }
        public string Address { get; set; }
    }
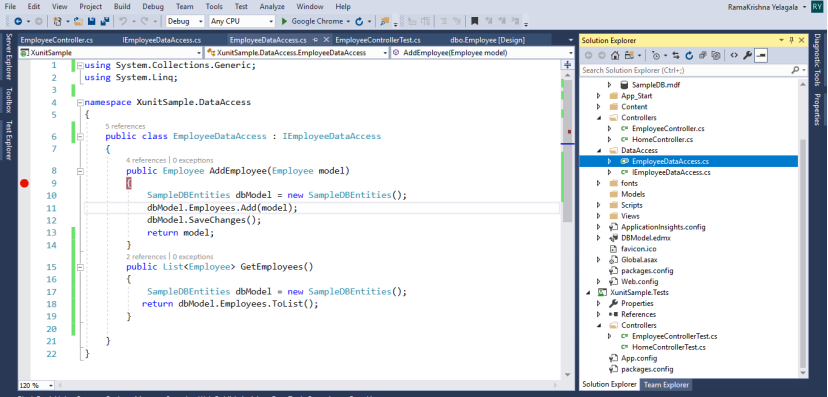
For all the DB interactions, I have created new class in the same project. We can create separate project for all DB interactions.
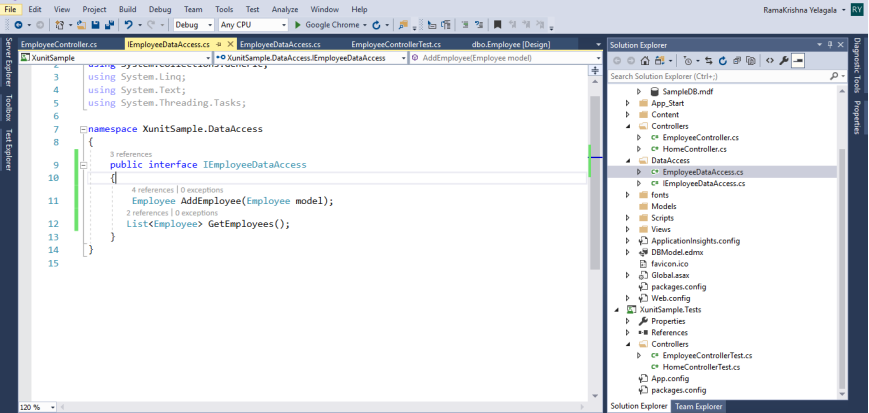
I have added IEmployeeDataAccess Interface and have written code to add employees using entity framework in the IEmployeeDataAccess class. This class implements the interface.
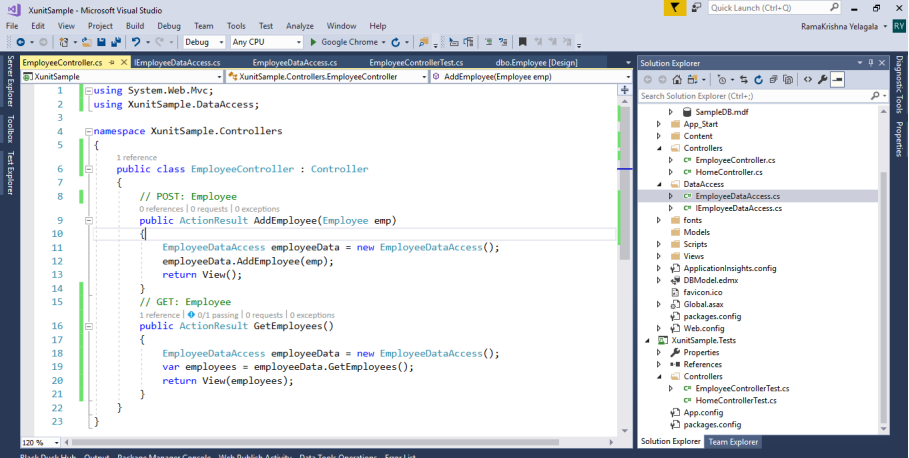
Form Controller:
In the Controller, I am calling AddEmployee() method with EmployeeDataAccess Instance.
*Note: As it is a sample project, I am not creating any UI. If anyone desires, please create UI for this requirement and try with this sample.
Unit Tests Implementation
In the XUnitSample.test project, add your main project (xUnitSample) as a reference to Unit Tests project.
Here, I am showing how to write Unit Test cases for DB interaction.
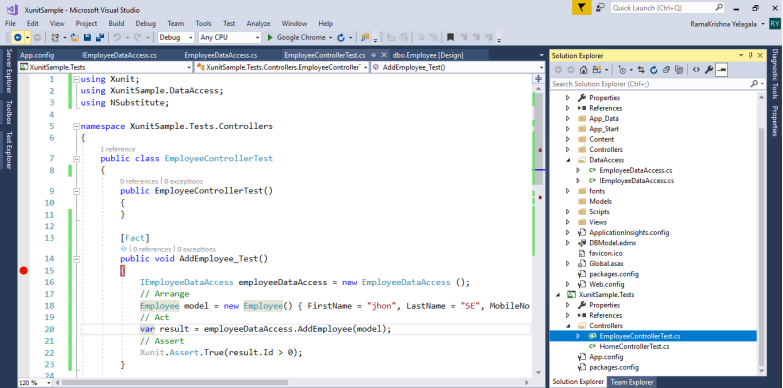
Create class with the name as EmployeeControllerTest and AddEmployee_Test() method where we can actually pass the test data to employee object.
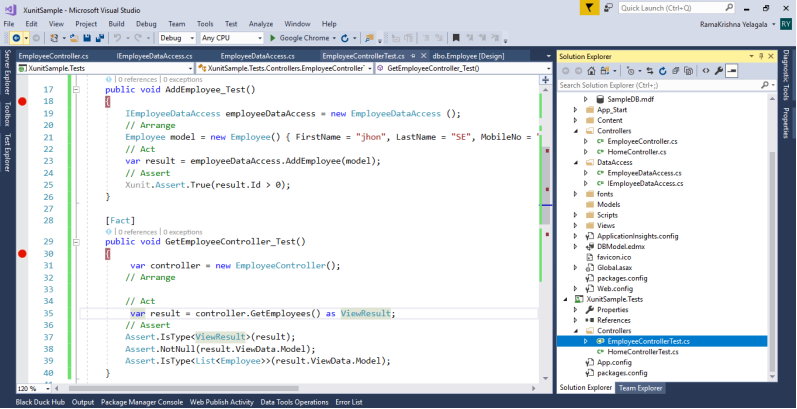
Now, I will show how we can implement Unit Tests to the Controller. For this, I am taking GetEmployees() method in the EmployeeControllerTest.cs file. I have added one more Unit Test GetEmployeeController_Test(), which will demonstrate controller Unit Test cases.
Till now, we have seen Unit Tests for DB Interaction and MVC Controllers. Here for NSubstitute, below example will demonstrate the NSubstitute usage.
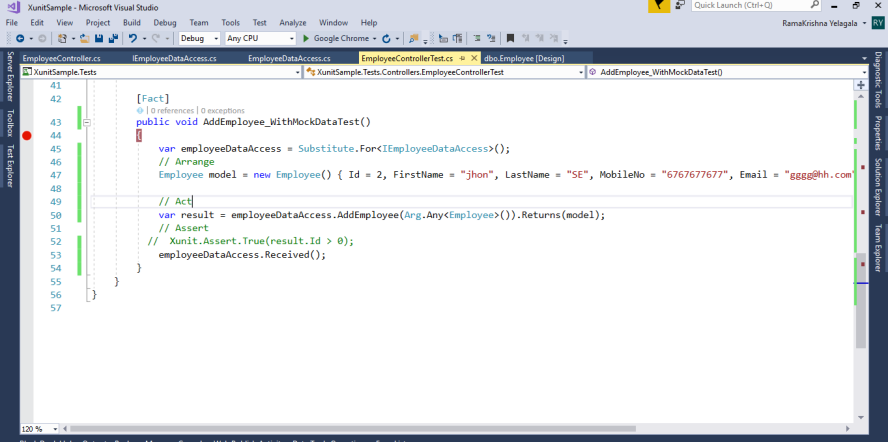
If we observe the below line, instead of creating an object, we are using substitute object to the IEmployeeDataAccess.
var employeeDataAccess = Substitute.For <IEmployeeDataAccess>();
Below line will not actually call AddEmployee, instead, Arg.Any <Employee> () will be acted as substitute object for the employee and Returns will be used to return our model object as a result.
var result = employeeDataAccess.AddEmployee(Arg.Any <Employee>()).Returns(model);
Before running the test cases, Add xunit.runner.visualstudio through NuGet as it is required to run and debug your test cases.
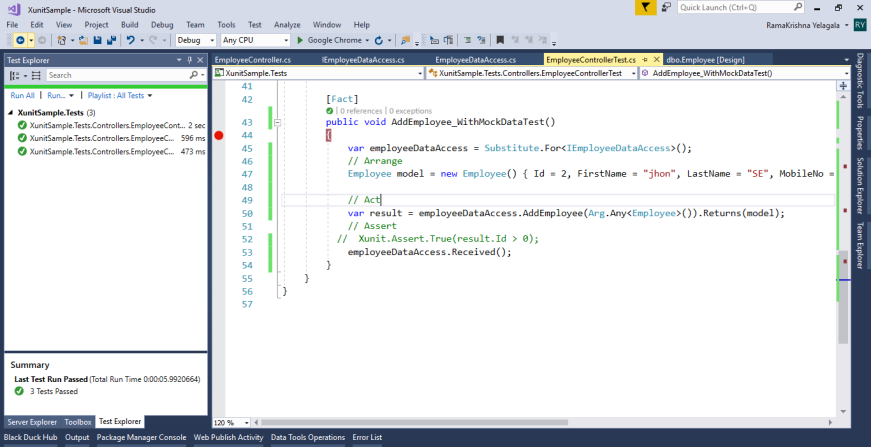
After installing the above, Build the Unit test project solution, then observe TestExplorer with test cases.
To run the test cases, use ‘Run All’ option so that all the test cases can be run and it can show the status in Test Explorer Window.
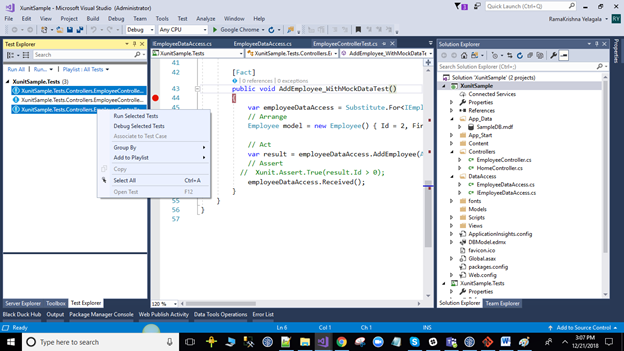
If you want to run specific test cases instead of running all at once, from the Test Explorer window, select the required test cases and right click, and select the ‘Run Selected Tests’ option. Below screenshot is for reference.
Another option is - Inside the Method, right click and choose ‘Run Tests’ so the current Test will be in Executed. Results can be shown in Test Explorer.
Last but not the least. How can we debug the test project?
Two options:
- Select the required test cases and right click, and select the ‘Debug Selected Tests’ option. Above screenshot is for reference.
- Inside the Method, right click and choose ‘Debug Tests’ so the current Test will be in Debug Mode. Below screenshot is for reference.
.png?width=1200&name=pastedImage%20(1).png)
Conclusion
With consistency and discipline applied in the field of software development process, Unit Testing can go a long way in assisting to write unit tests quickly and easily.
About Innominds
Innominds is a leading Digital Transformation and Product Engineering company headquartered in San Jose, CA. It specializes in ideating, designing, and developing cost-effective, cutting-edge digital product and application solutions and services for your business’ IT needs. Starting from inception of ideas, offering Product Lifecycle Management Services, Legacy Transformations, Cloud Engineering and Design Architecture among others, we have got it covered for you. We help companies in accelerating their digital transformation evolution. With over 12 years of experience in building digital products from scratch and over 100 products engineered, Innominds is well placed to cater to all your products and applications requirements.
Interested! For any demos or project discussions, please write to us at marketing@innominds.com and know more about our offerings.