Swift Package Manager (SPM) is a tool for managing the distribution of Swift code. It is integrated with the Swift build system to automate the process of downloading, compiling, and linking dependencies. SPM provides a convention-based system for building libraries & executables, and sharing code across different packages.
Versions Supported: Swift 3.0 and above
There are many ways to add 3rd party libraries into the application. The following are the best ways to integrate 3rd party libraries:
- CocoaPods
- Carthage
- Swift Package Manager
1. CocoaPods
CocoaPods is a dependency manager for Swift and Objective-C Cocoa projects. It has over 30,000 libraries and is used in over 1.9 million apps. CocoaPods can help you scale your projects elegantly. More details can be found at http://cocoapods.org
CocoaPods focuses on source-based distribution of third-party code and automatic integration into Xcode projects.
Platforms Supported
All Apple platforms, iOS, tvOS, watchOS, and macOS support CocoaPods dependencies. CocoaPods command line tool only works on a Mac.
CocoaPods also provides a central place where third party libraries can be found. This improves discoverability of open source libraries that can be used in projects. With CocoaPods, updating your dependencies is easily done with the ‘pod update command.’
Advantages
- CocoaPods make managing dependencies in your code easier
- Adding and removing dependencies is just a matter of defining them in a file and running a command to install them
- CocoaPods reads the file, determines the dependencies that the listed libraries have, and whether there are any shared dependencies or not
- We can search any kind of dependency in CocoaPods official website
- CocoaPods supports both dynamic and static libraries
- We can easily tell anyone what dependencies we are using in the app
- It's easy to check if a new version of a dependency is available by using the ‘pod outdated’ command
- Lots of contributors with well-grown community
Disadvantages
- Installation process will take more time to install CocoaPods
- With CocoaPods built on RUBY, it is paramount to have its knowledge, if one wants to understand CocoaPods internal implementation.
- Every time you build your project, all your dependencies will also be built, which leads to slower build times
- CocoaPods creates new workspace directory, which has xcworkspace extension. We have to use Xcode workspace in order to make CocoaPods work
- CocoaPods added some scripts in the build phases of our target
- Linked the Pods Frameworks to “Link Binaries with Libraries
- CocoaPods takes controls of entire Xcode project and if something fails, entire project stops building
- Breakpoints doesn’t work properly on the added libraries source code
- As CocoaPods has a centralised repository for all packages and in case of its service being down, a project cannot be built without committing the codes along the pods.
- CI/CD integration with server is hard as we have to install and manage Ruby libraries
How to Install CocoaPods?
- Open terminal and execute below command
$ sudo gem install cocoapods - Create a Xcode project. Open the project path in the terminal
$ cd Projectpath - Enter init command
$ pod init - Open the pod file in the project folder in any text editor. Add any pod name in the Pod file.
Example: pod 'Alamofire', '~> 3.3'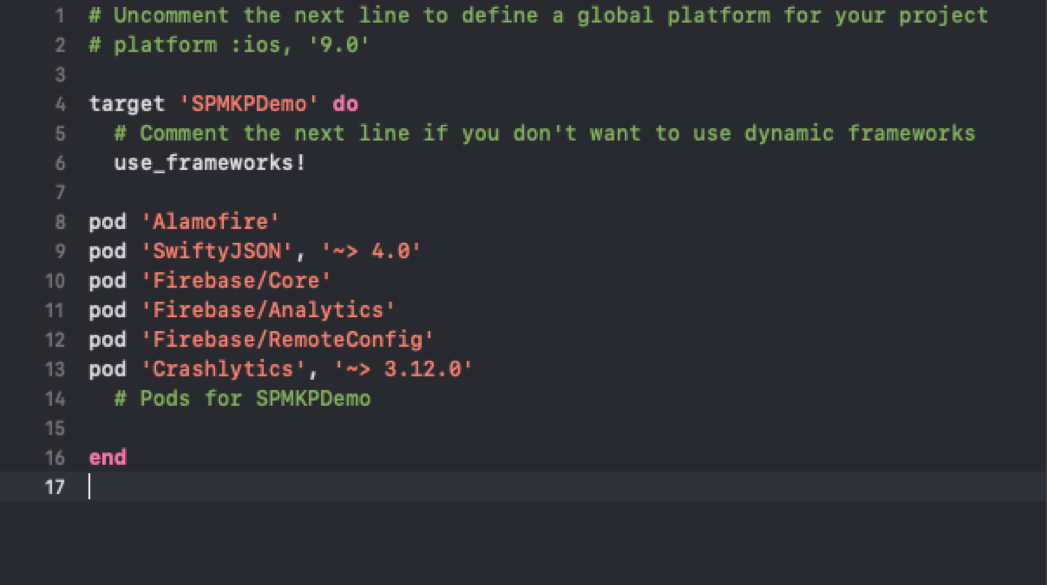
- Now, open the terminal in same project path and execute below mentioned command
$ pod installIt will create new xcworkspace in the project folder. To continue with the project, instead of projectName.xcodeproj, we will use the projectName.xcworkspace.
Now, the pod setup is completed.
If you want to use added library in view controller, just import it.
Example: import Alamofire
2. Carthage
We can install Carthage by using HomeBrew or we can download the .pkg from Github and install it manually.
Git URL: https://github.com/Carthage/Carthage/releases
Platforms Supported
All Apple platforms, iOS, tvOS, watchOS, and macOS support Carthage dependencies. Carthage command line tool only works on a Mac.
Integration Steps
- Open terminal and execute the below mentioned command
$ brew install carthage - Subsequently, in order to integrate a dependency using Carthage, you have to create a Cartfile in your project root folder.
Adding Cartfile:
Open terminal and execute the following command
$ touch Cartfile.
Now, Cartfile is created.
Convert it into executable file.
$ chmod +x [YourDirectory/Cartfile] - Open Cartfile with text editor and add the following line
github "Alamofire/Alamofire" - Open the terminal and run the following command
$ carthage update
It creates a Carthage folder in your project root folder. It also creates Build folder in the app with all the platforms. For example, Alamofire, a framework that supports all Apple platforms, is equipped with iOS, Mac, tvOS, and watchOS folders.
If you want to only build dependencies for a specified platform, run below command, which will build dependencies for iOS platform.
$ carthage update --platform iOS. - Drag the built.framework binaries from Carthage/Build/<platform> into your application’s Xcode project.
- On your application targets’ Build Phases settings tab, click the + icon and choose New Run Script Phase. Create a Run Script in which you specify your shell (ex: /bin/sh), add the following contents to the script area below the shell:
$ /usr/local/bin/carthage copy-frameworks - Add the paths to the frameworks you want to use under “Input Files". For example:
$(SRCROOT)/Carthage/Build/iOS/Alamofire.framework - Add the paths to the copied frameworks to the “Output Files”. For example:
$(BUILT_PRODUCTS_DIR)/$(FRAMEWORKS_FOLDER_PATH)/Alamofire.framework
Advantages
- Carthage is purely written in Swift so that iOS developers can understand the technology behind Carthage
- Supports both Dynamic Frameworks and Static Libraries
- Carthage won’t touch your Xcode settings or project files. It downloads and builds dependencies
- Carthage can be easily integrated with Continuous Integration server
Disadvantages
- Not every framework supports Carthage
- Carthage has too many manual steps that need to be performed during setup
3. Swift Package Manager
Apple developed its own package manager, which is fast and robust. So, it’s time to migrate all our team members from CocoaPods and Carthage to SPM.
You can install SPM in two different ways. Xcode < 11 or Xcode > = 11.
In Xcode <11, you need to run the command to add Swift package.
Steps to add package:
$ mkdir TodoKit
$ cd TodoKit
$ swift package init
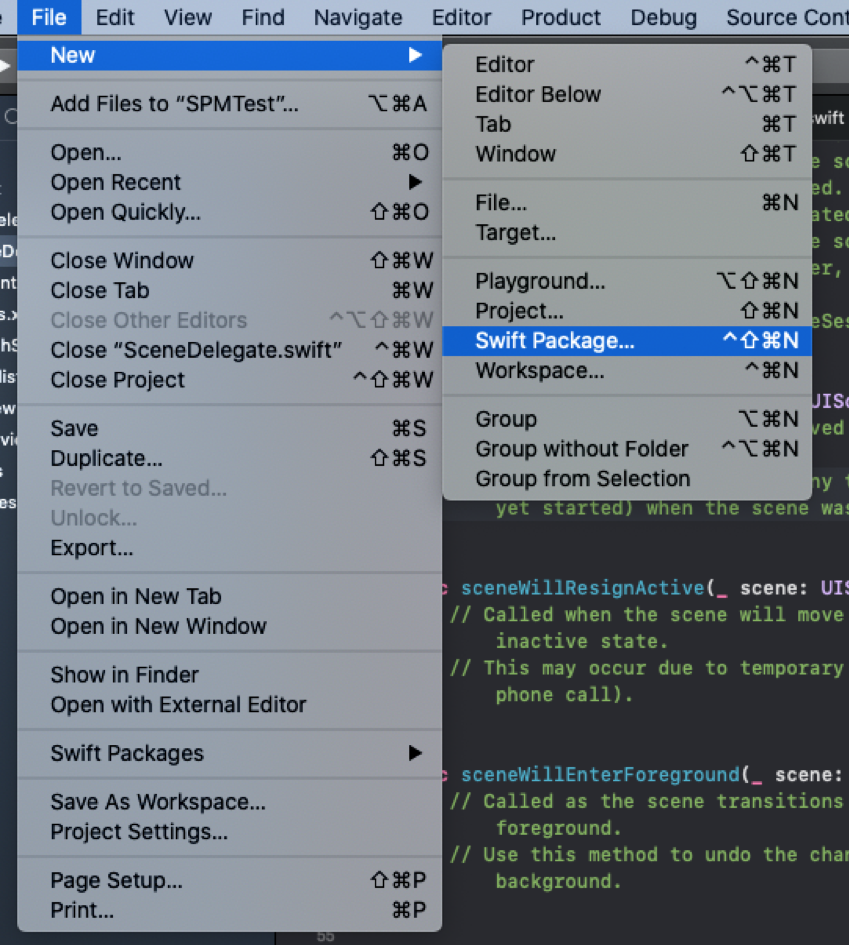
But in Xcode 11, we can also perform the above setup using the File > New > Swift Package menu.
Adding Package Dependencies to Your App with Xcode 11
You can add package dependency into the application in two simple ways in Xcode 11.
- Adding package dependency from File menu
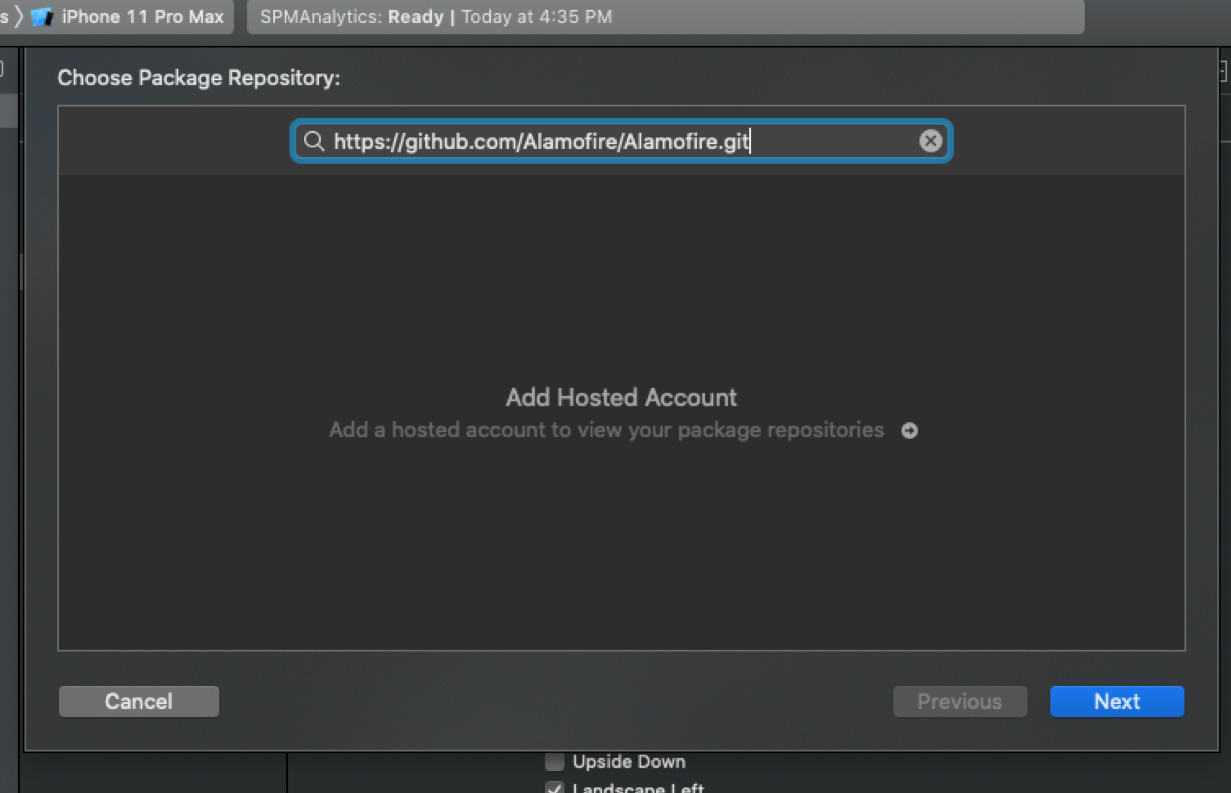
- Open Project File -> Swift packages -> Add package dependency
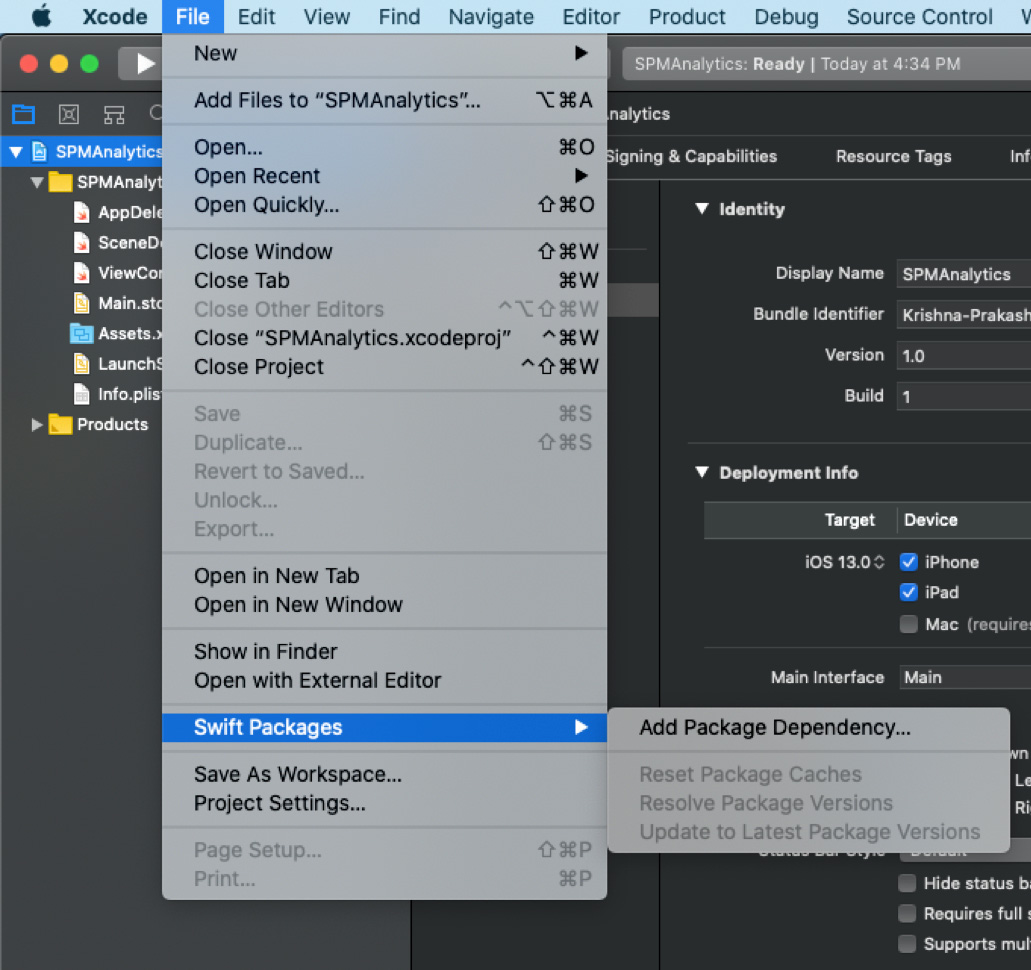
- Add Repository URL and click on Next
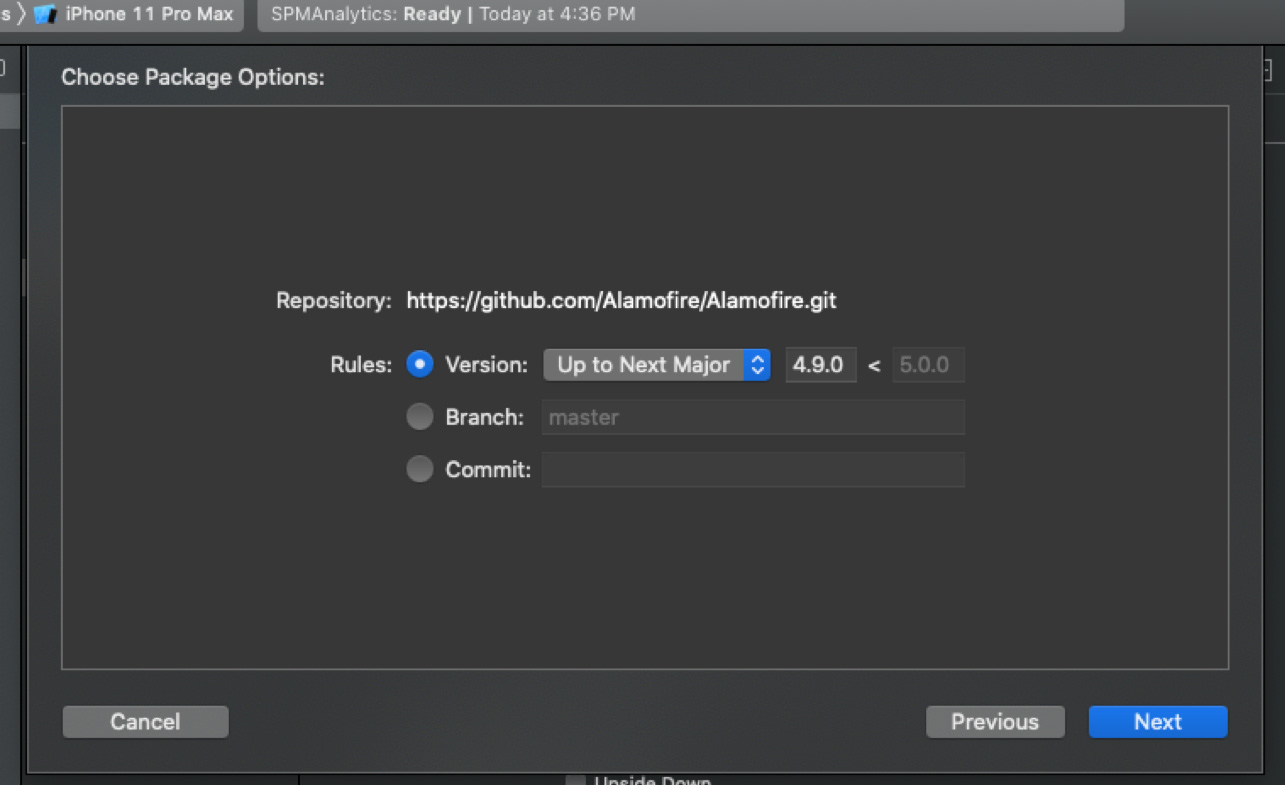
- Choose your Version, Brach or Commit ID from the options to download specific repository. Later, click on Next
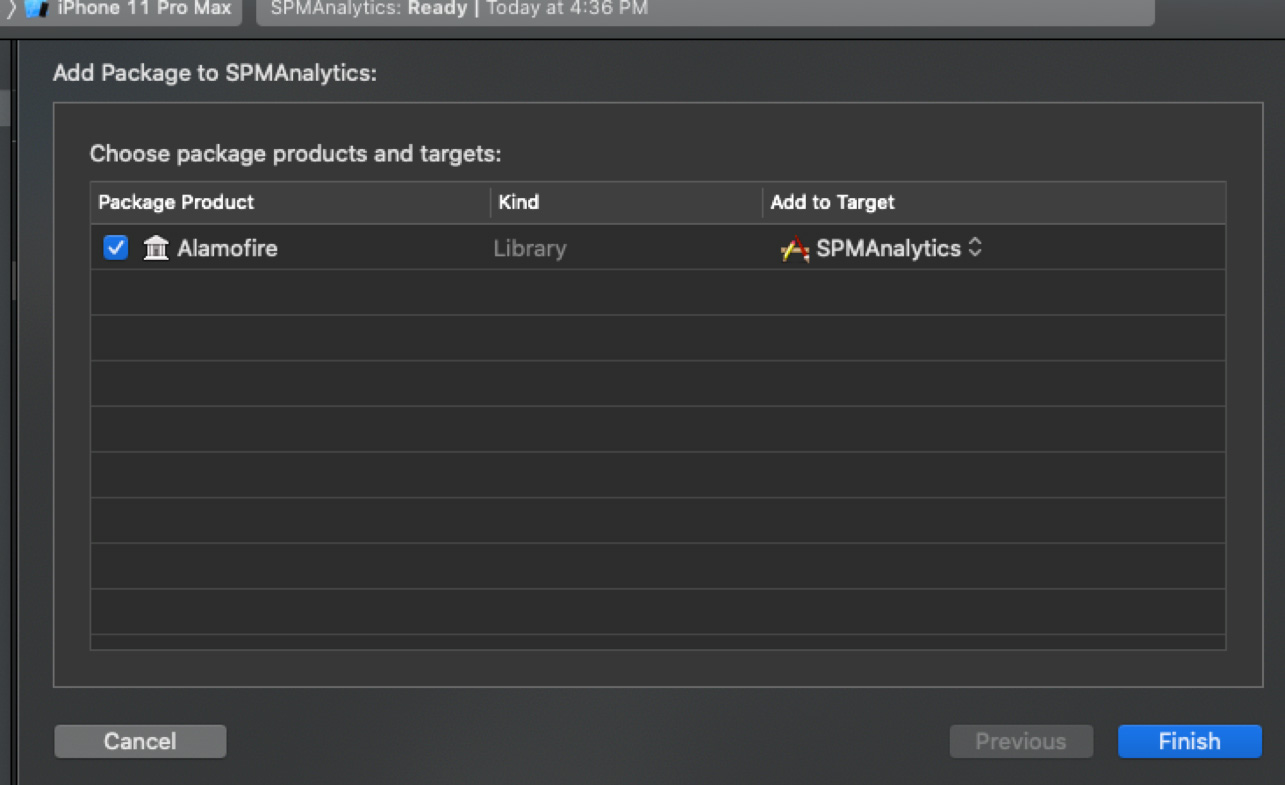
- In the final step, it asks for product and targets. Select products or targets if you have multiple product and targets. Then, click on ‘Finish.’
- Open Project File -> Swift packages -> Add package dependency
- Using Build Phases
- Open Build Phases - > Link Binary and Libraries -> Click on (+)
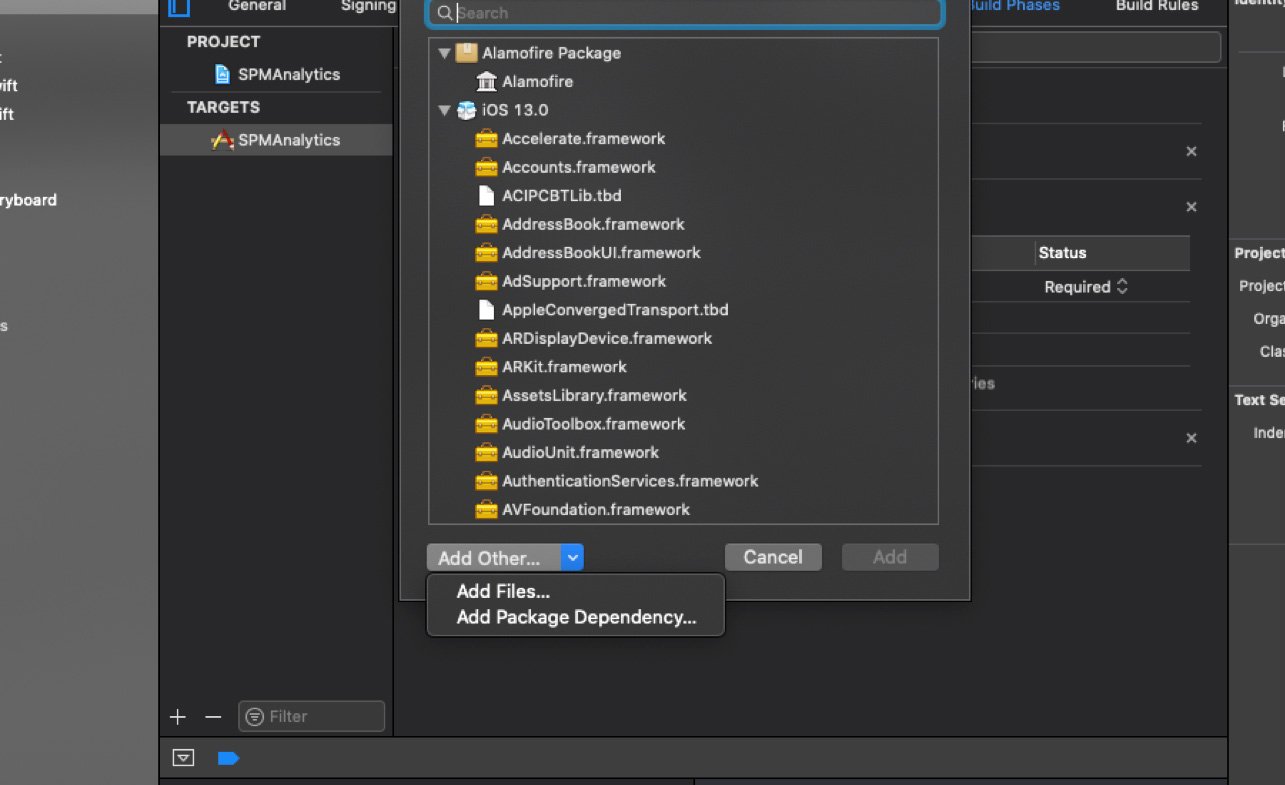
- Select Add Other and choose Add Package Dependency. Then, add your Repository URL and do the same process as mentioned above.
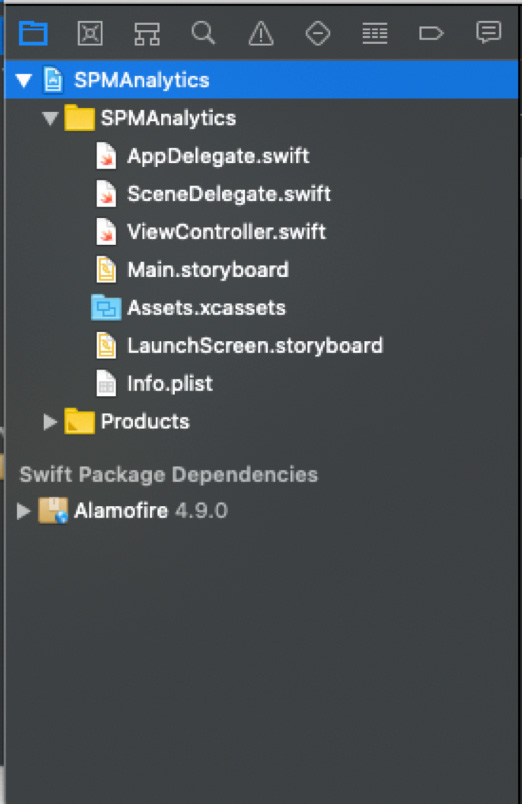
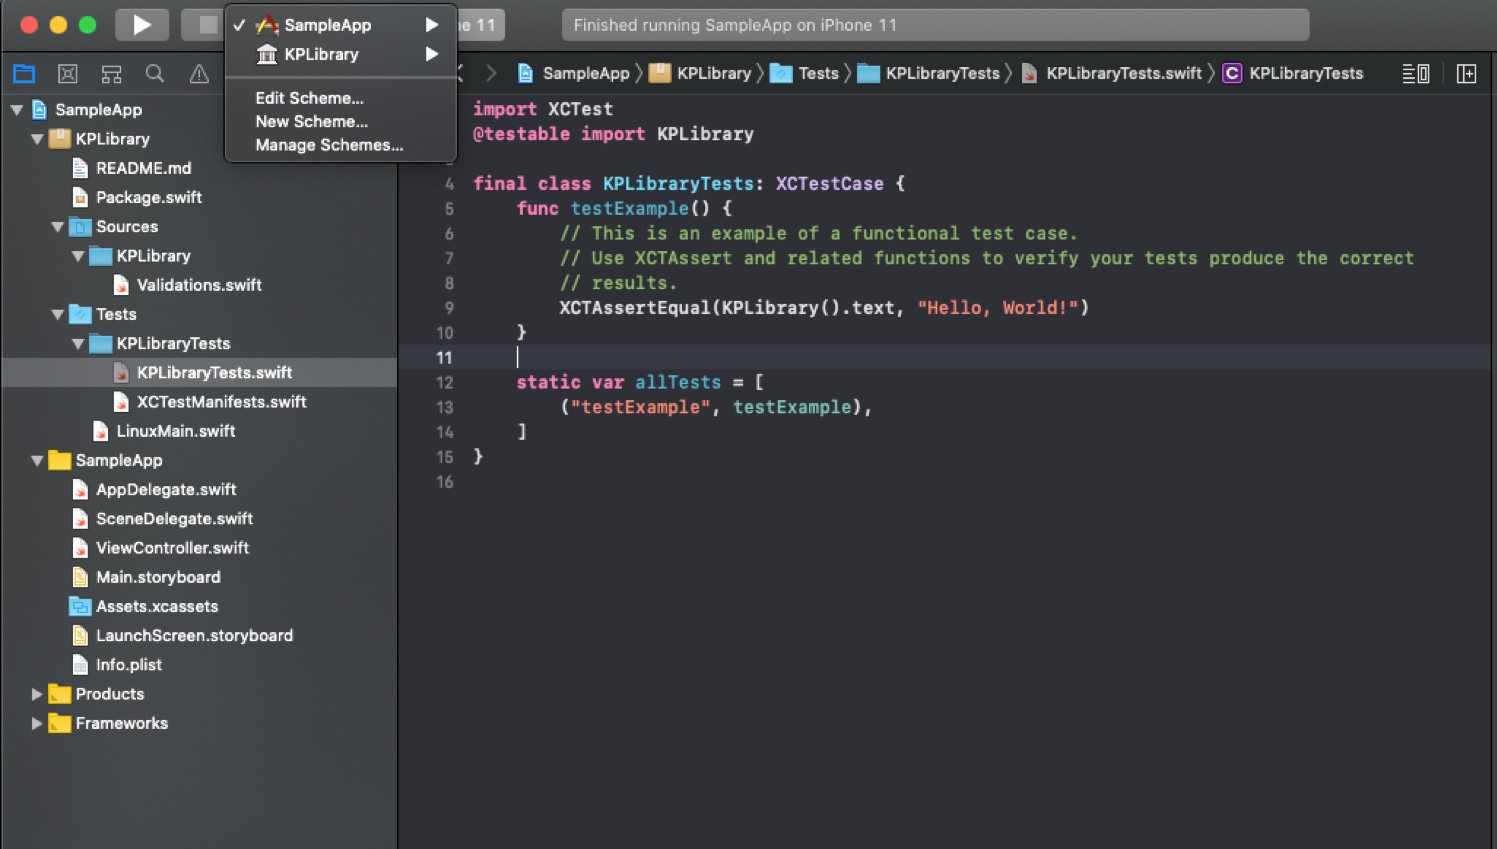
After successfully adding the dependency into the project, the structure looks like the below image.
- Use package dependency into your application by importing.
Ex: import Alamofire
- Open Build Phases - > Link Binary and Libraries -> Click on (+)
How to Remove Swift Package Dependency from App
- Select Project -> Swift Packages
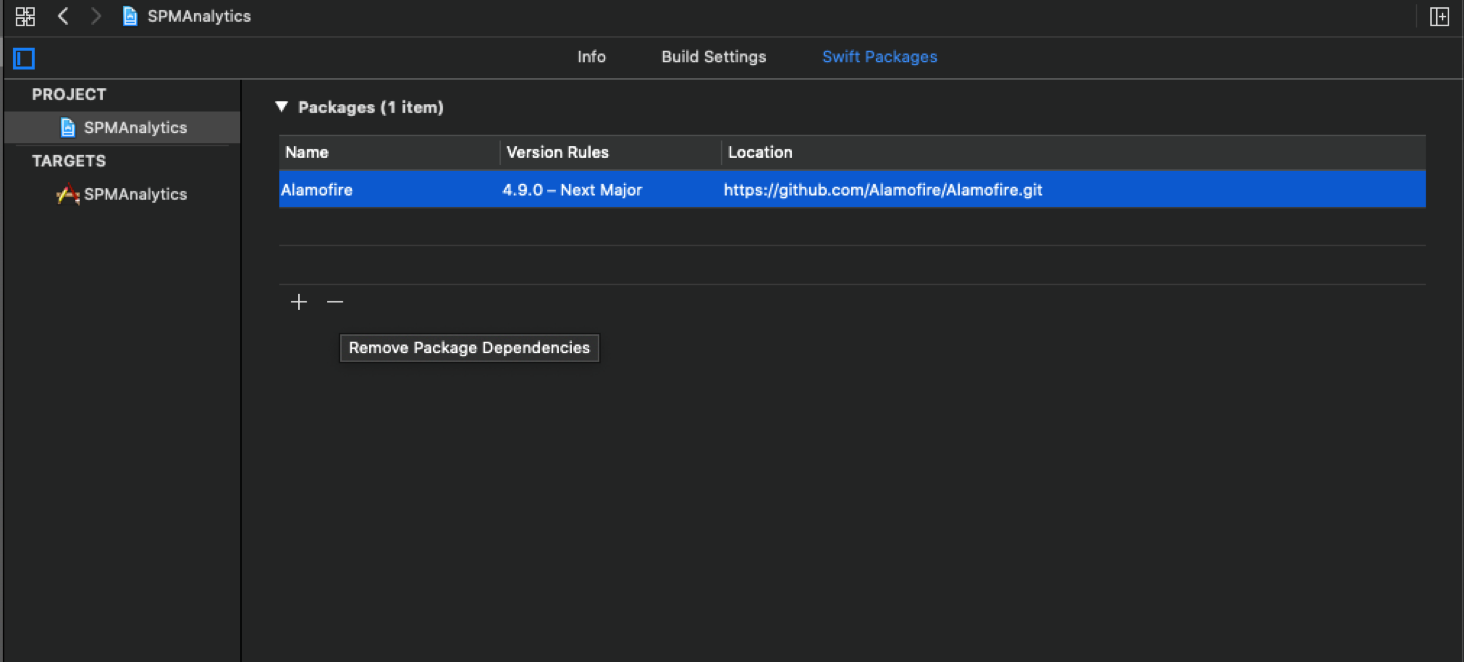
- Select your swift package, then click on (-). It will remove swift package from your application.
Creating and Building Swift Package with Xcode 11
One of the most exciting new features in Xcode 11 is that the SPM is within Apple’s IDE. Xcode 11 offers complete support for creating and editing package.
- Open File -> New -> Swift Package
- Name the package and save it in a safe place.
- Swift package contains below files:
- Read.md
- Package.swift
- Sources
- Tests
- Package.swift: This is the manifest of your library. You can add your dependencies into this file.
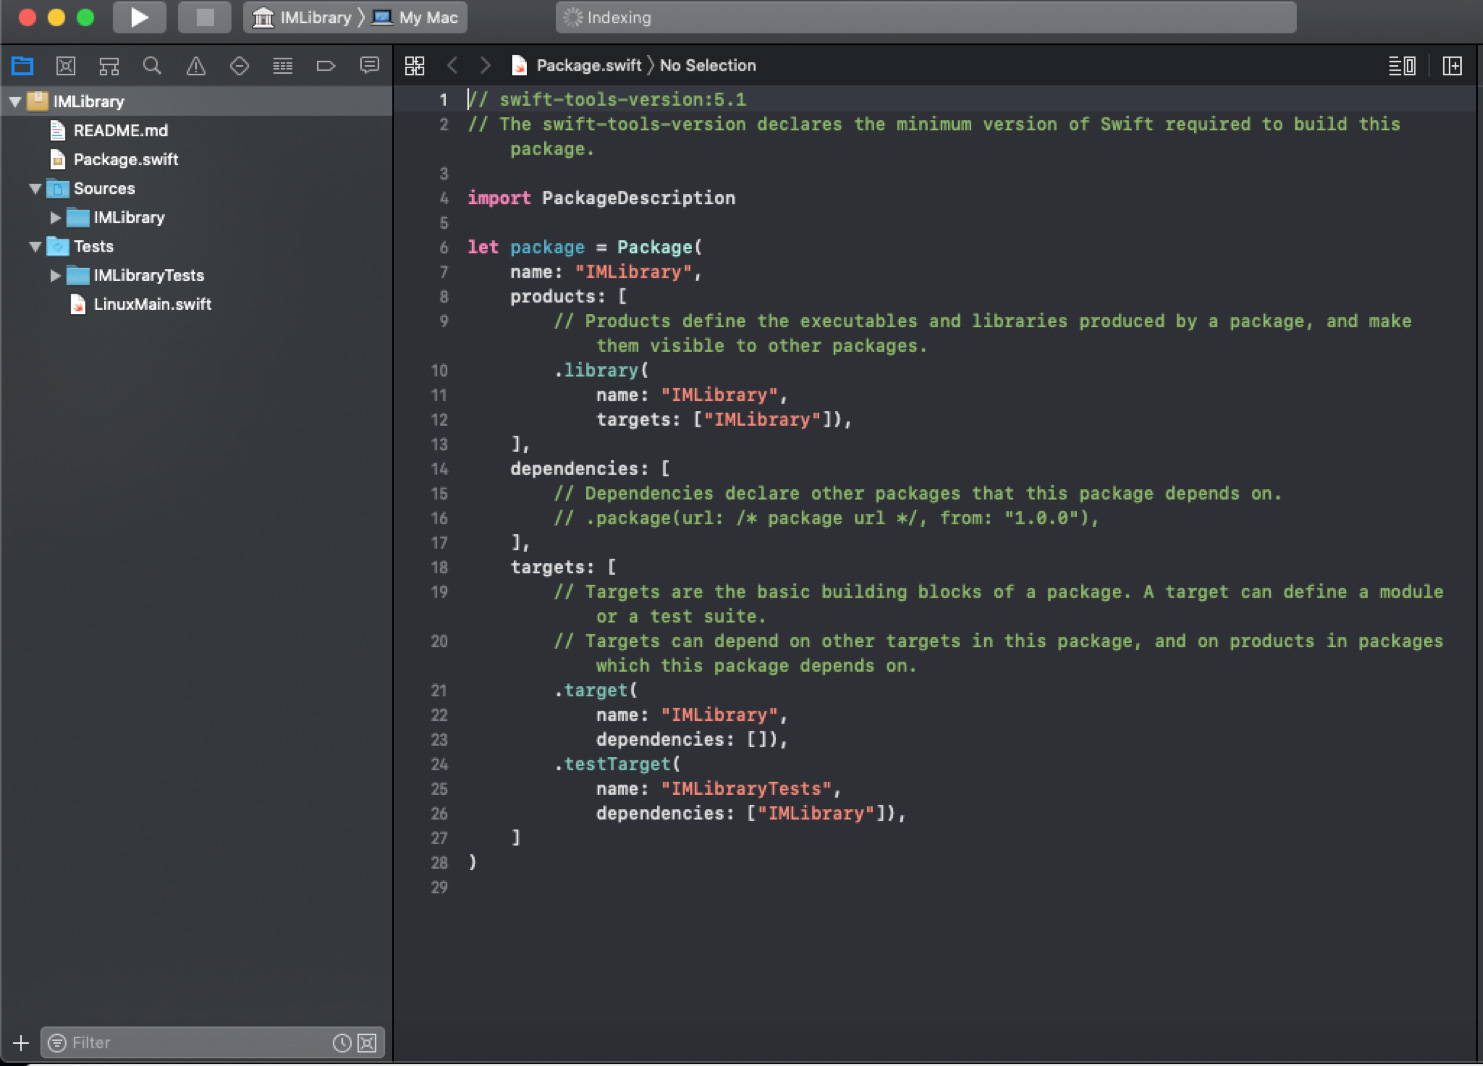
- Sources: Add your classes into the sources folder. The folder name in Sources is always matched with the products -> .library -> targets in package.swift file. You can add multiple folder names in targets.
- Tests: You can write all the test cases related to your library in this folder.
Building App with Swift Package Manager
Here, I am explaining ways to build your own Swift Package Manager with an example. I am creating s SPM for validations.
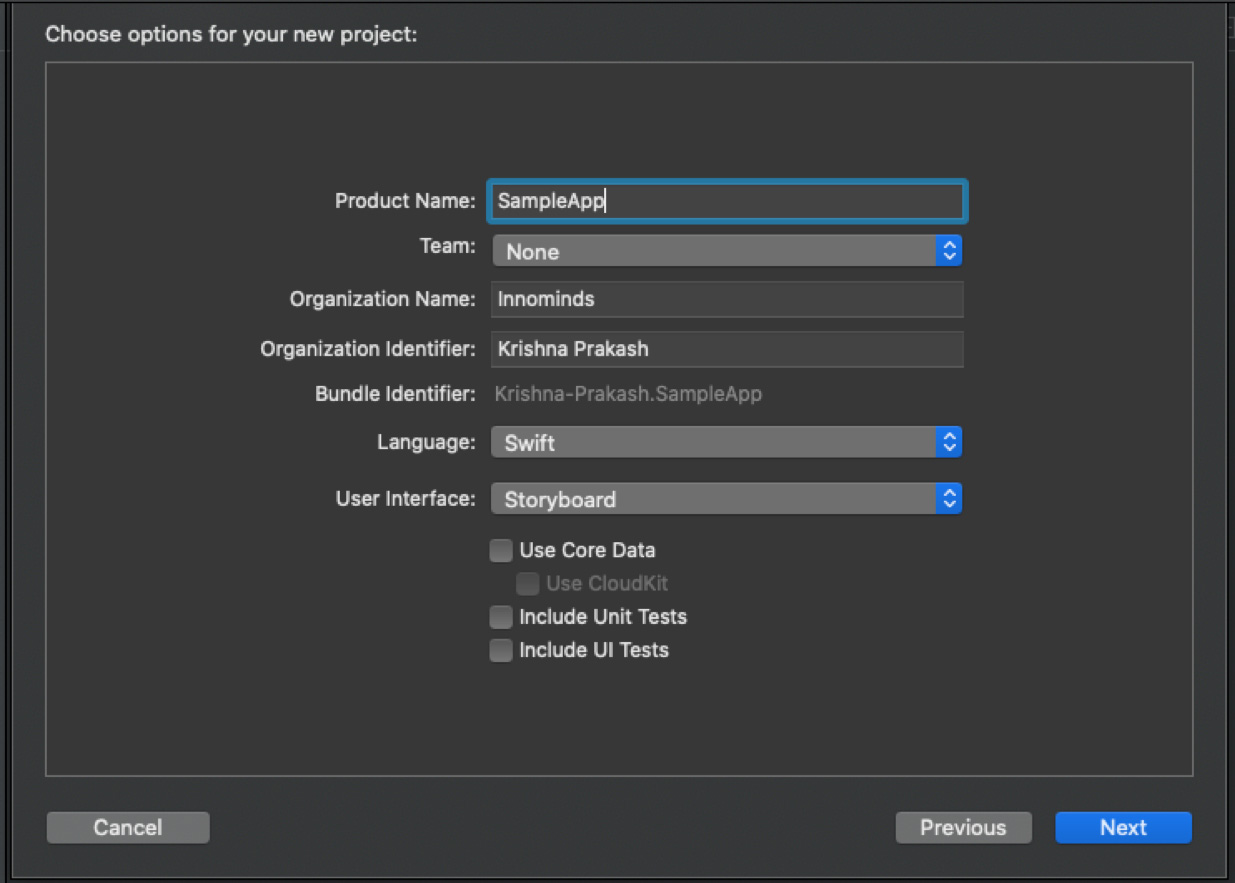
- Let’s create a sample app.
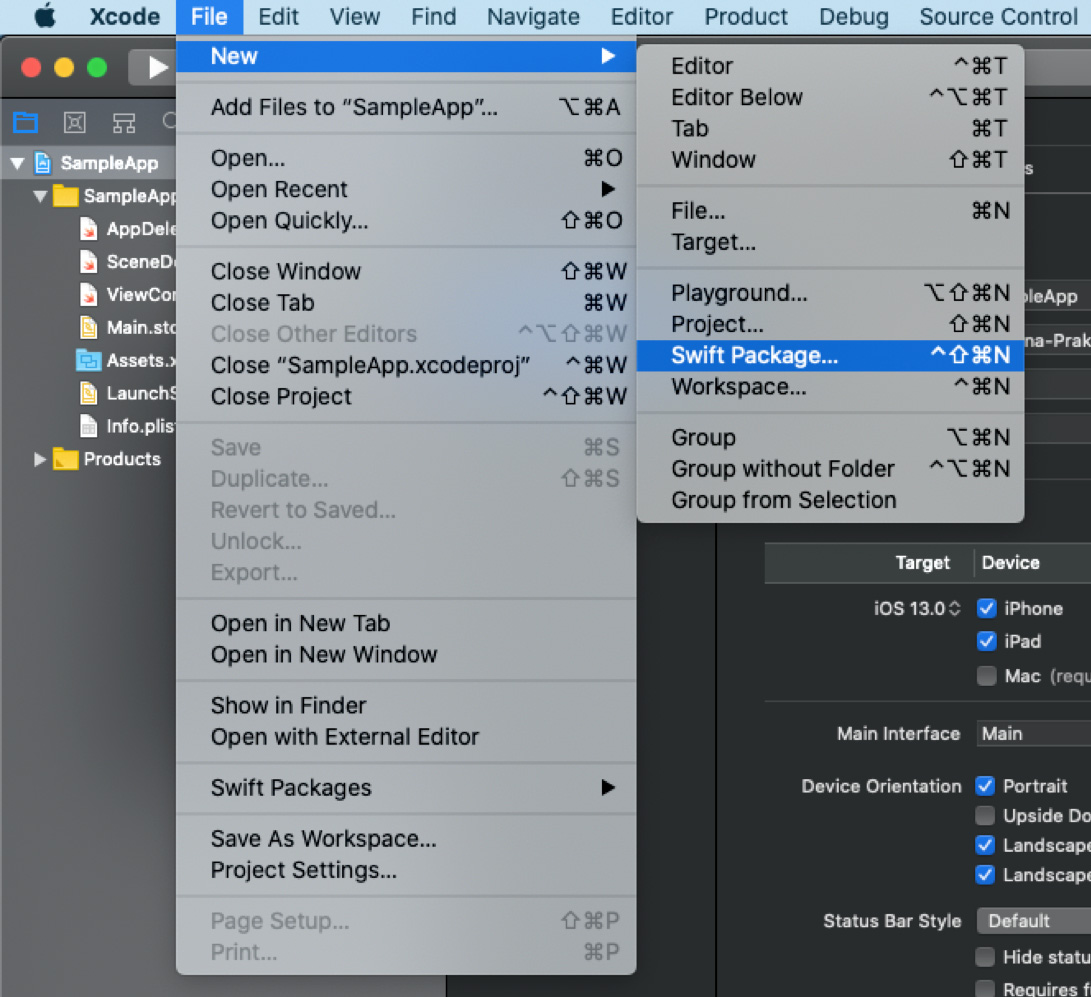
- Add swift package into the sample app. File - > New -> Swift Package
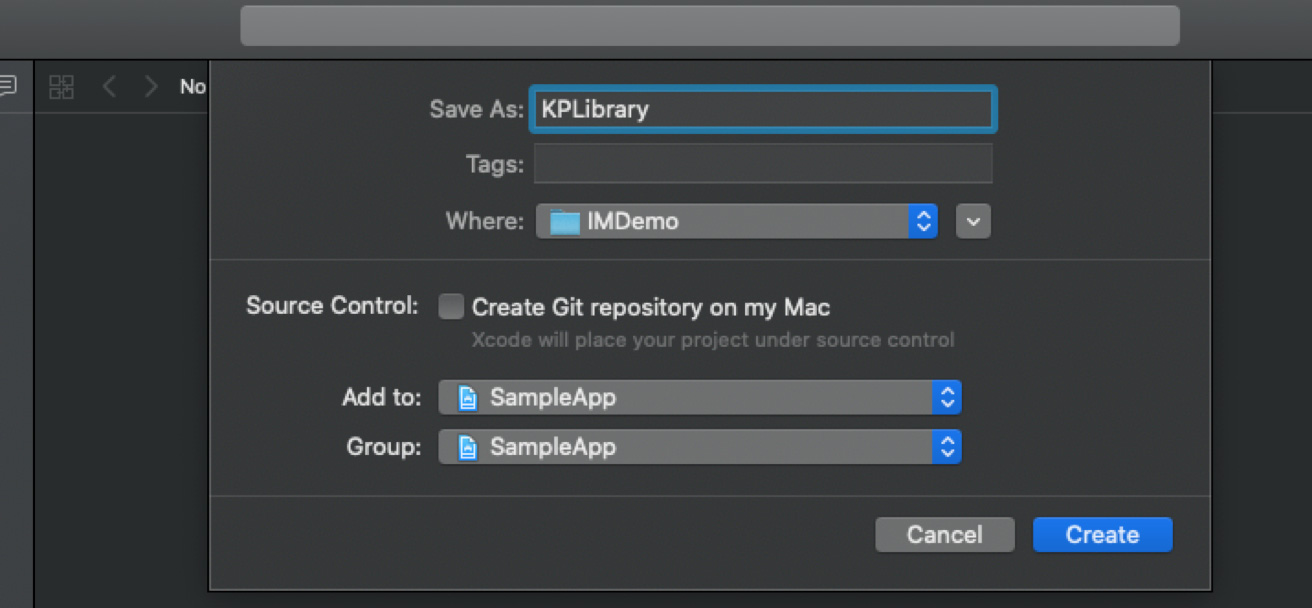
- Name your library and select your project name for Add to: and Group to: then click on create.
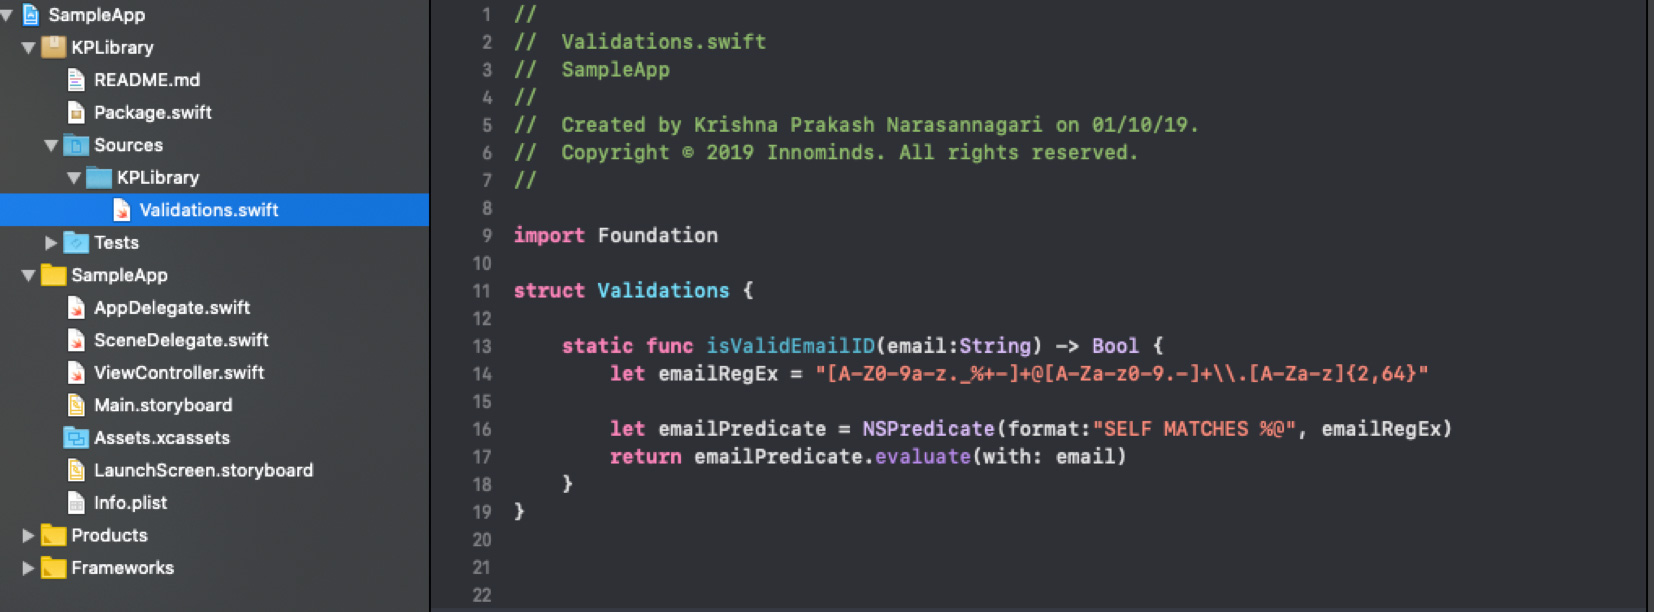
- Created Validations.swift file and added email validation in the swift file.
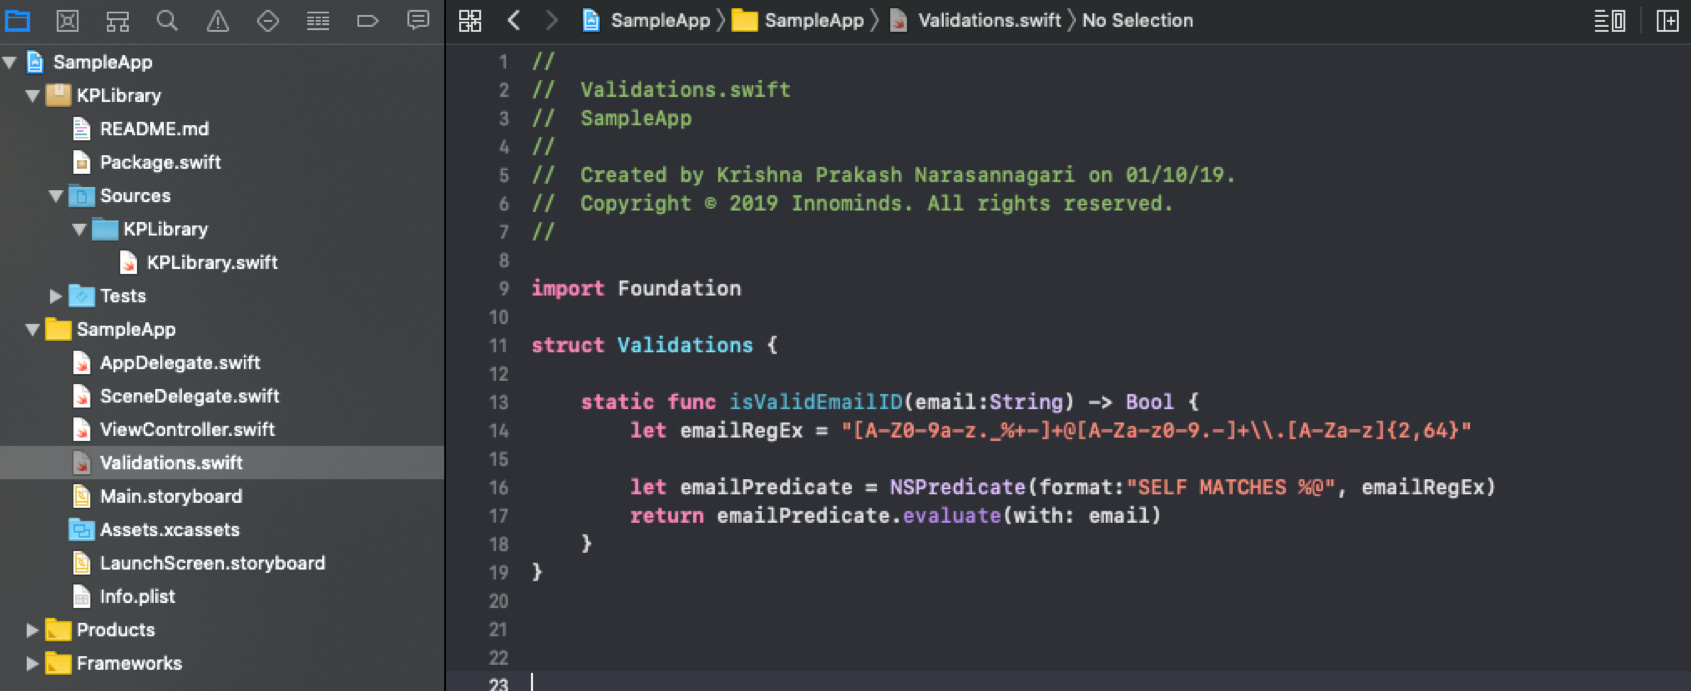
- I want to move validation file into my SPM. So, I removed KPLibrary.swift file in SPM and dragged and dropped the Validations.swift file into KPLibrary folder.
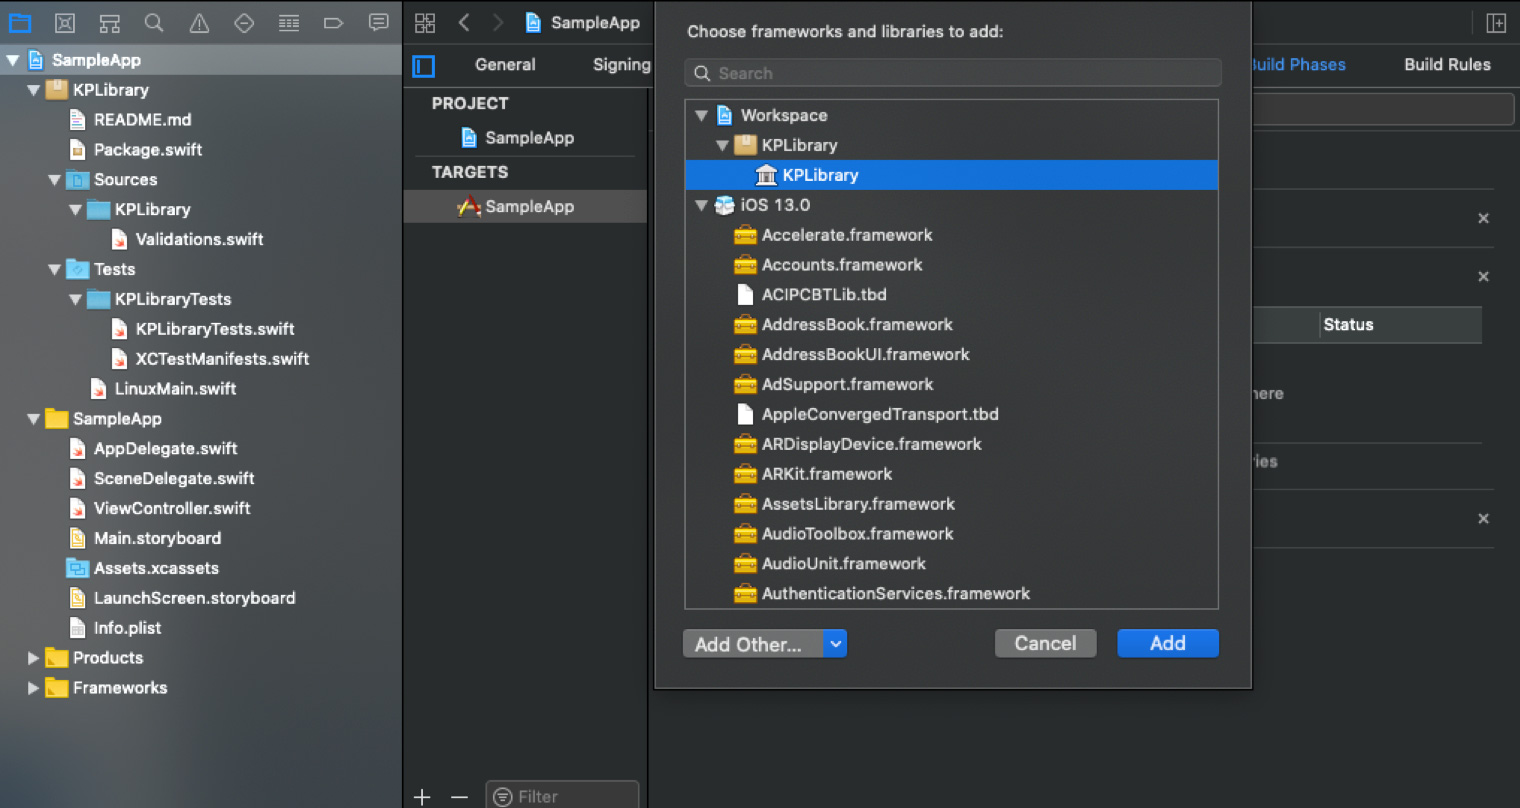
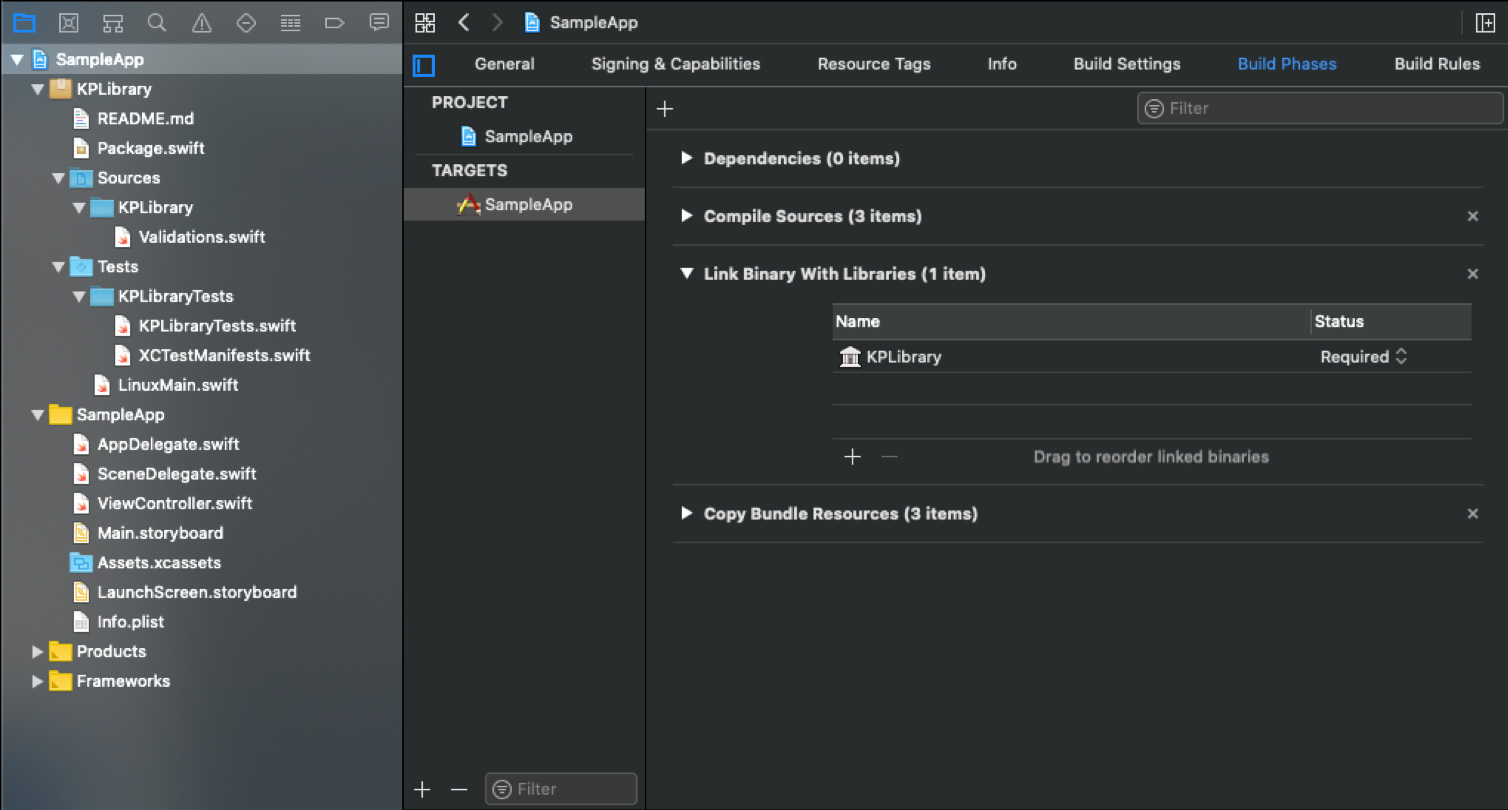
- Add the KPLibrary into ‘Link Binary With Libraries’ in the sample app.
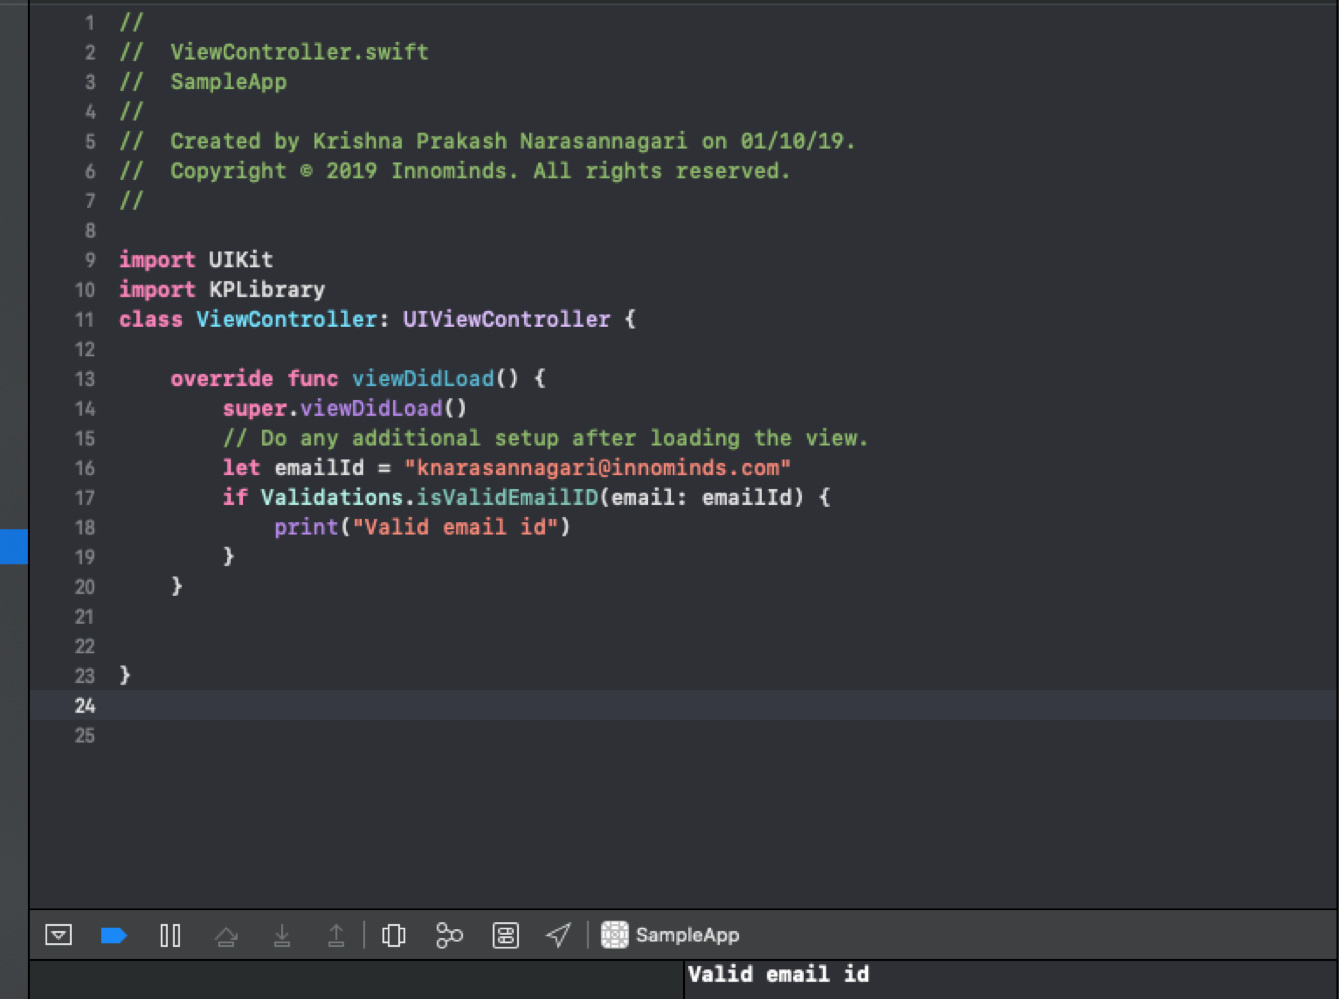
- Import your library in the project and use it.
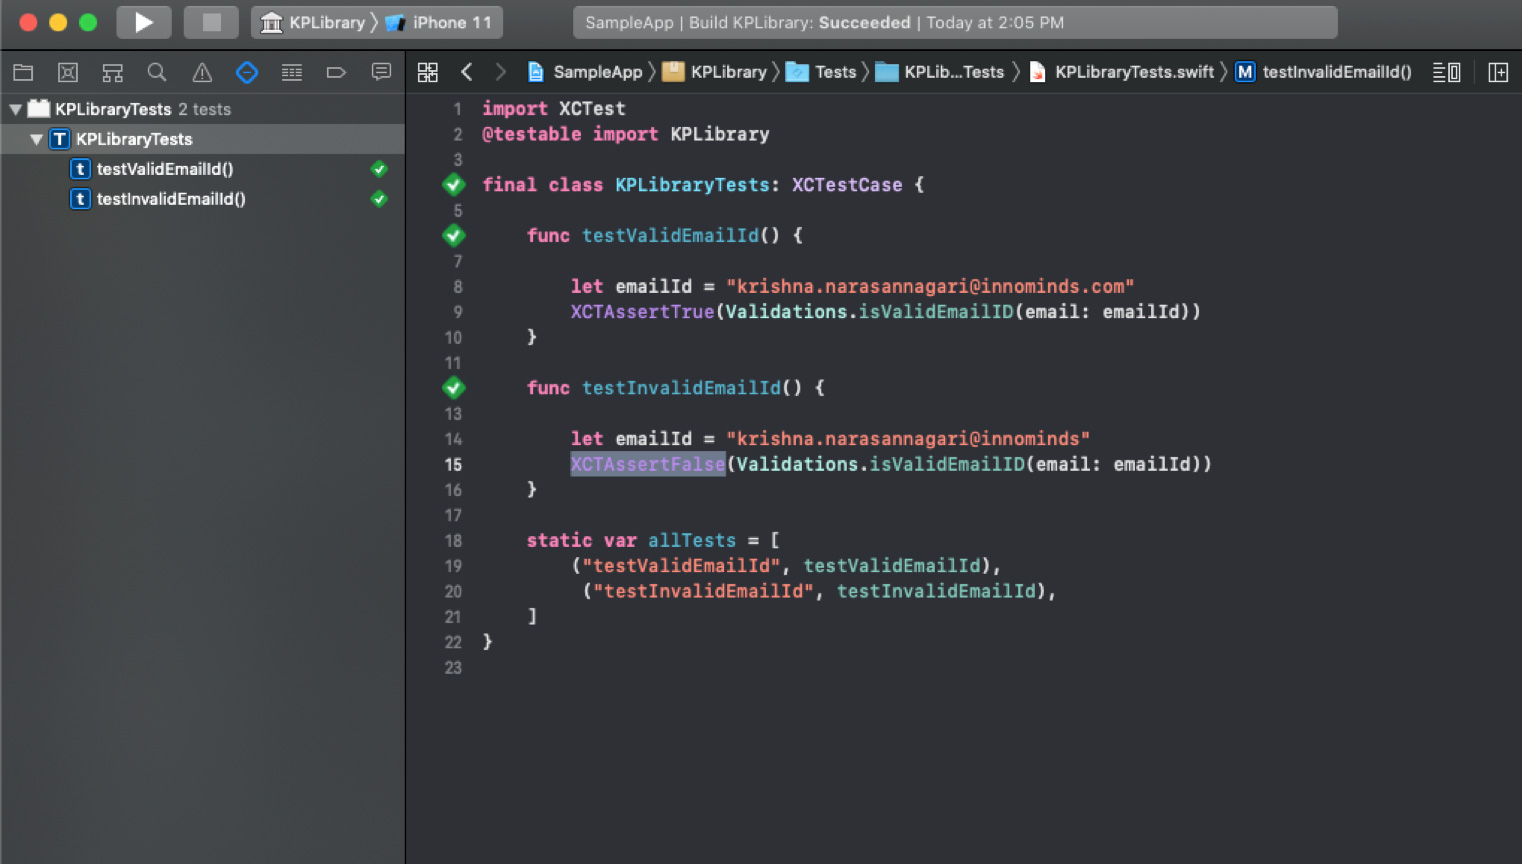
Unit Test Cases
You can write unit test cases for your package in test folder.
- Click on the project name and select your library
- Write the test cases for your library and run the test cases
- That’s all. You built your own package manager. If you want to keep this library into the git, just drag and drop your library package manager into the desktop and commit it into the git. By using git URL, you can add it to any projects.
Advantages
- SPM works on both Mac and Linux platforms
- SPM is built by Apple
- We can easily say what dependencies we are using in the app
- SPM will not compile all the dependencies every time. Hence, compile time will reduce.
- If a package is depending on another package, SPM automatically handles it
Disadvantages
- At this point of time, SPM doesn’t support all third-party libraries
- Need to concentrate on maintaining specific target structure in manifest file
Metrics
I created three sample empty applications and added Alamofire with pods, Carthage and SPM. Below are the metrics on my system with Mac OS (10.15) and Xcode 11.0 (beta). These values may vary from system to system.
|
Metric Type |
Pods |
Carthage |
SPM |
|---|---|---|---|
|
Source code size |
133Kb |
160Kb |
30Kb |
|
ipa size |
550Kb |
550Kb |
512Kb |
|
App launch time after clean (might vary based on RAM and memory |
14-18 sec |
14-18 sec |
12-14 sec |
Conclusion
With Swift Package Manager, your code is not only better but also officially supported by Apple. As far as future projects are concerned, it makes sense to start with it and move the existing dependency managers to SPM as and when opportunities arise.
About Innominds
Innominds is a leading Digital Transformation and Product Engineering company headquartered in San Jose, CA. It offers co-creation services to enterprises for building solutions utilising digital technologies focused on Devices, Apps, and Analytics. Innominds builds better outcomes securely for its clients through reliable advanced technologies like IoT, Blockchain, Big Data, Artificial Intelligence, DevOps and Enterprise Mobility among others. From idea to commercialisation, we strive to build convergent solutions that help our clients grow their business and realise their market vision.
To know more about our offerings, please write to marketing@innominds.com